|
||||
  |
    |
|||
|
||||
|
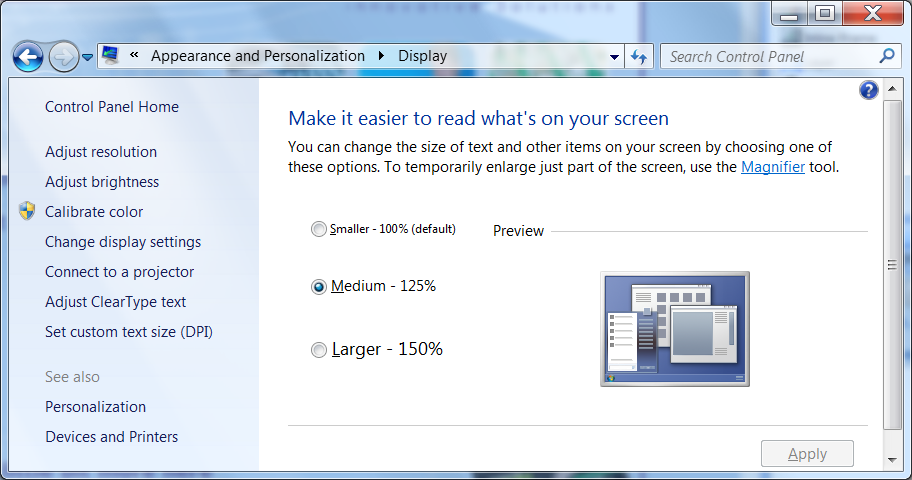
Good Feature! In Windows 7 you can get to this really nice feature in Control Panel, Appearance and Personalization, there is an option to "Make text and other items larger or smaller". When selected, this next screen appears:
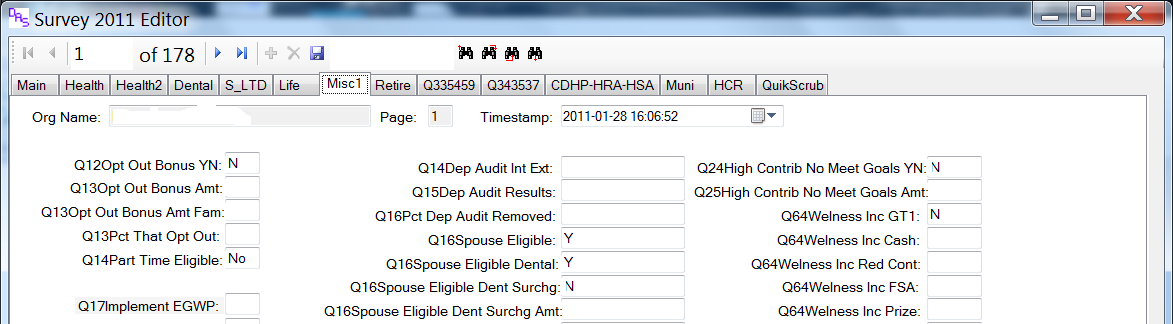
All these images are thumbnails - click on one of them to see the image in full screen. On the "Make it easier to read what's on your screen" page, if you select anything other than the default 100% - like Medium - 125% or Larger - 150%, some programs will no longer look good. When good features go badThe first thing I did when my client called and asked me why my program wasn't working anymore was connect up to their screen and see what was going on. They didn't initially tell me this is what they did, they just said they were on Windows 7. What I saw made me do a double take. The first screen is what the page looks like normally, and the second screen is what it did look like on the Windows 7 machine when magnified to 125%:
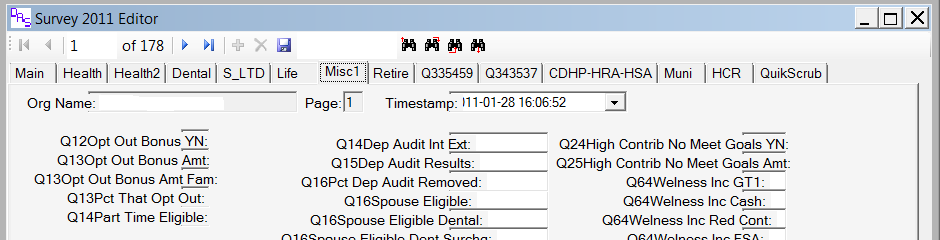
The application is an editor for data in an SQL database, with lots of cryptic field names and spaces to enter their values. Above is the screen on a Windows 7 box at 100%.
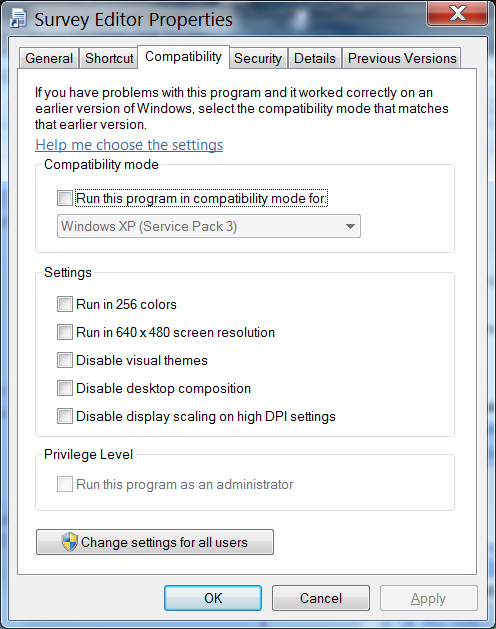
This is the exact same screen & record on the same system where the screen is set to 125%. The size of the labels in front of each of the data fields has grown and the data field is partially overwritten by the label. What didn't workI did some searching on the web and found many users complaining of the same thing in various commercial software packages. There were lots of suggestions, and I tried them all - most revolved around turning on various options on the compatibility dialogue box for the application:
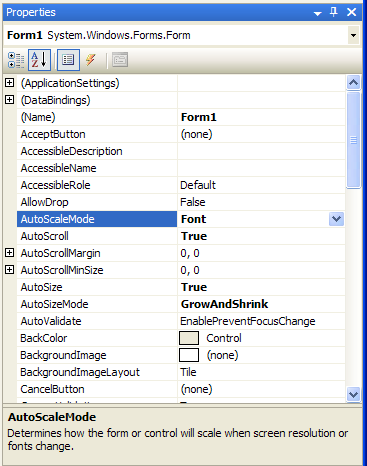
I tried them all - none of them worked. Some were pretty bad (like 640x480 screen resolution mode). You are certainly welcome to try them as well, but in my case this was a complete waste of time. One web user came up with the option of using the new "Magnify Screen" option, which you can get to by either running magnify.exe or hitting the window key and the plus sign (though Window and equal sign works just as well) and get out of it with Window Escape. I was personally thrilled as I had no idea this feature existed, and always love putting new tools on my belt. But my client wasn't as happy with this work around either. What did work!Fortunately for my client, I actually wrote the application he was running. I also can't put an unsolved puzzle away, so I poked around inside of Visual Studio to see what I could do. My first thought was to somehow attach the field name to the data field so they always stayed a constant distance apart. Not finding anything like that, I turned to the form itself and there looking at all the properties I found gold. If in visual studio's design mode you click on the form itself and look at the form's properties, you'll find a property called "AutoScaleMode" that can be "None", "Font", "DPI", and "Inherit".
By default, Visual Studio 2005 sets this value to "None". I tried "Font" and "DPI" - both made my problem go away with very slightly different results. My goal here is not to repeat what you can read in the Visual Studio Help file, but to point you at the right direction and turn you loose. Highlight the control and hit the help button, there is a ton of information there. Here is the same screen, same application, with the option set to DPI running on a Windows 7 box with the screen set to 125%:
As you can see, problem solved! If you aren't a software engineer and are running some third party commercial application, if you can talk to someone high enough in the company or close enough to the software development staff, pointing them at this page might give them an easy tweak to make which will make all their windows 7 customers much happier. ------ If you found this helpful (or not), please send me a brief email -- one line
will more than do. If I see people need, want, and / or use this kind of
information that will encourage me to keep creating this kind of content.
Whereas if I never hear from anyone, then why bother? David Soussan (C) 2011 DAS Computer Consultants, LTD. All Rights Reserved.
The following items below this line are for search engines to assist them in indexing this content.
Magnify screen 125% 150% Vista Windows 7 Control panel "Make it easier
to read what's on your screen" |
||||