|
||||
  |
    |
|||
|
||||
|
My plan for data destruction! Yes, I could do the DoD wipe thing. But it is way cheaper to destroy the drive in another way - by taking it apart. And then, you get to salvage one or two way cool magnets from inside. It is easy - I'll walk you through the steps below, with pictures! |
||||
|
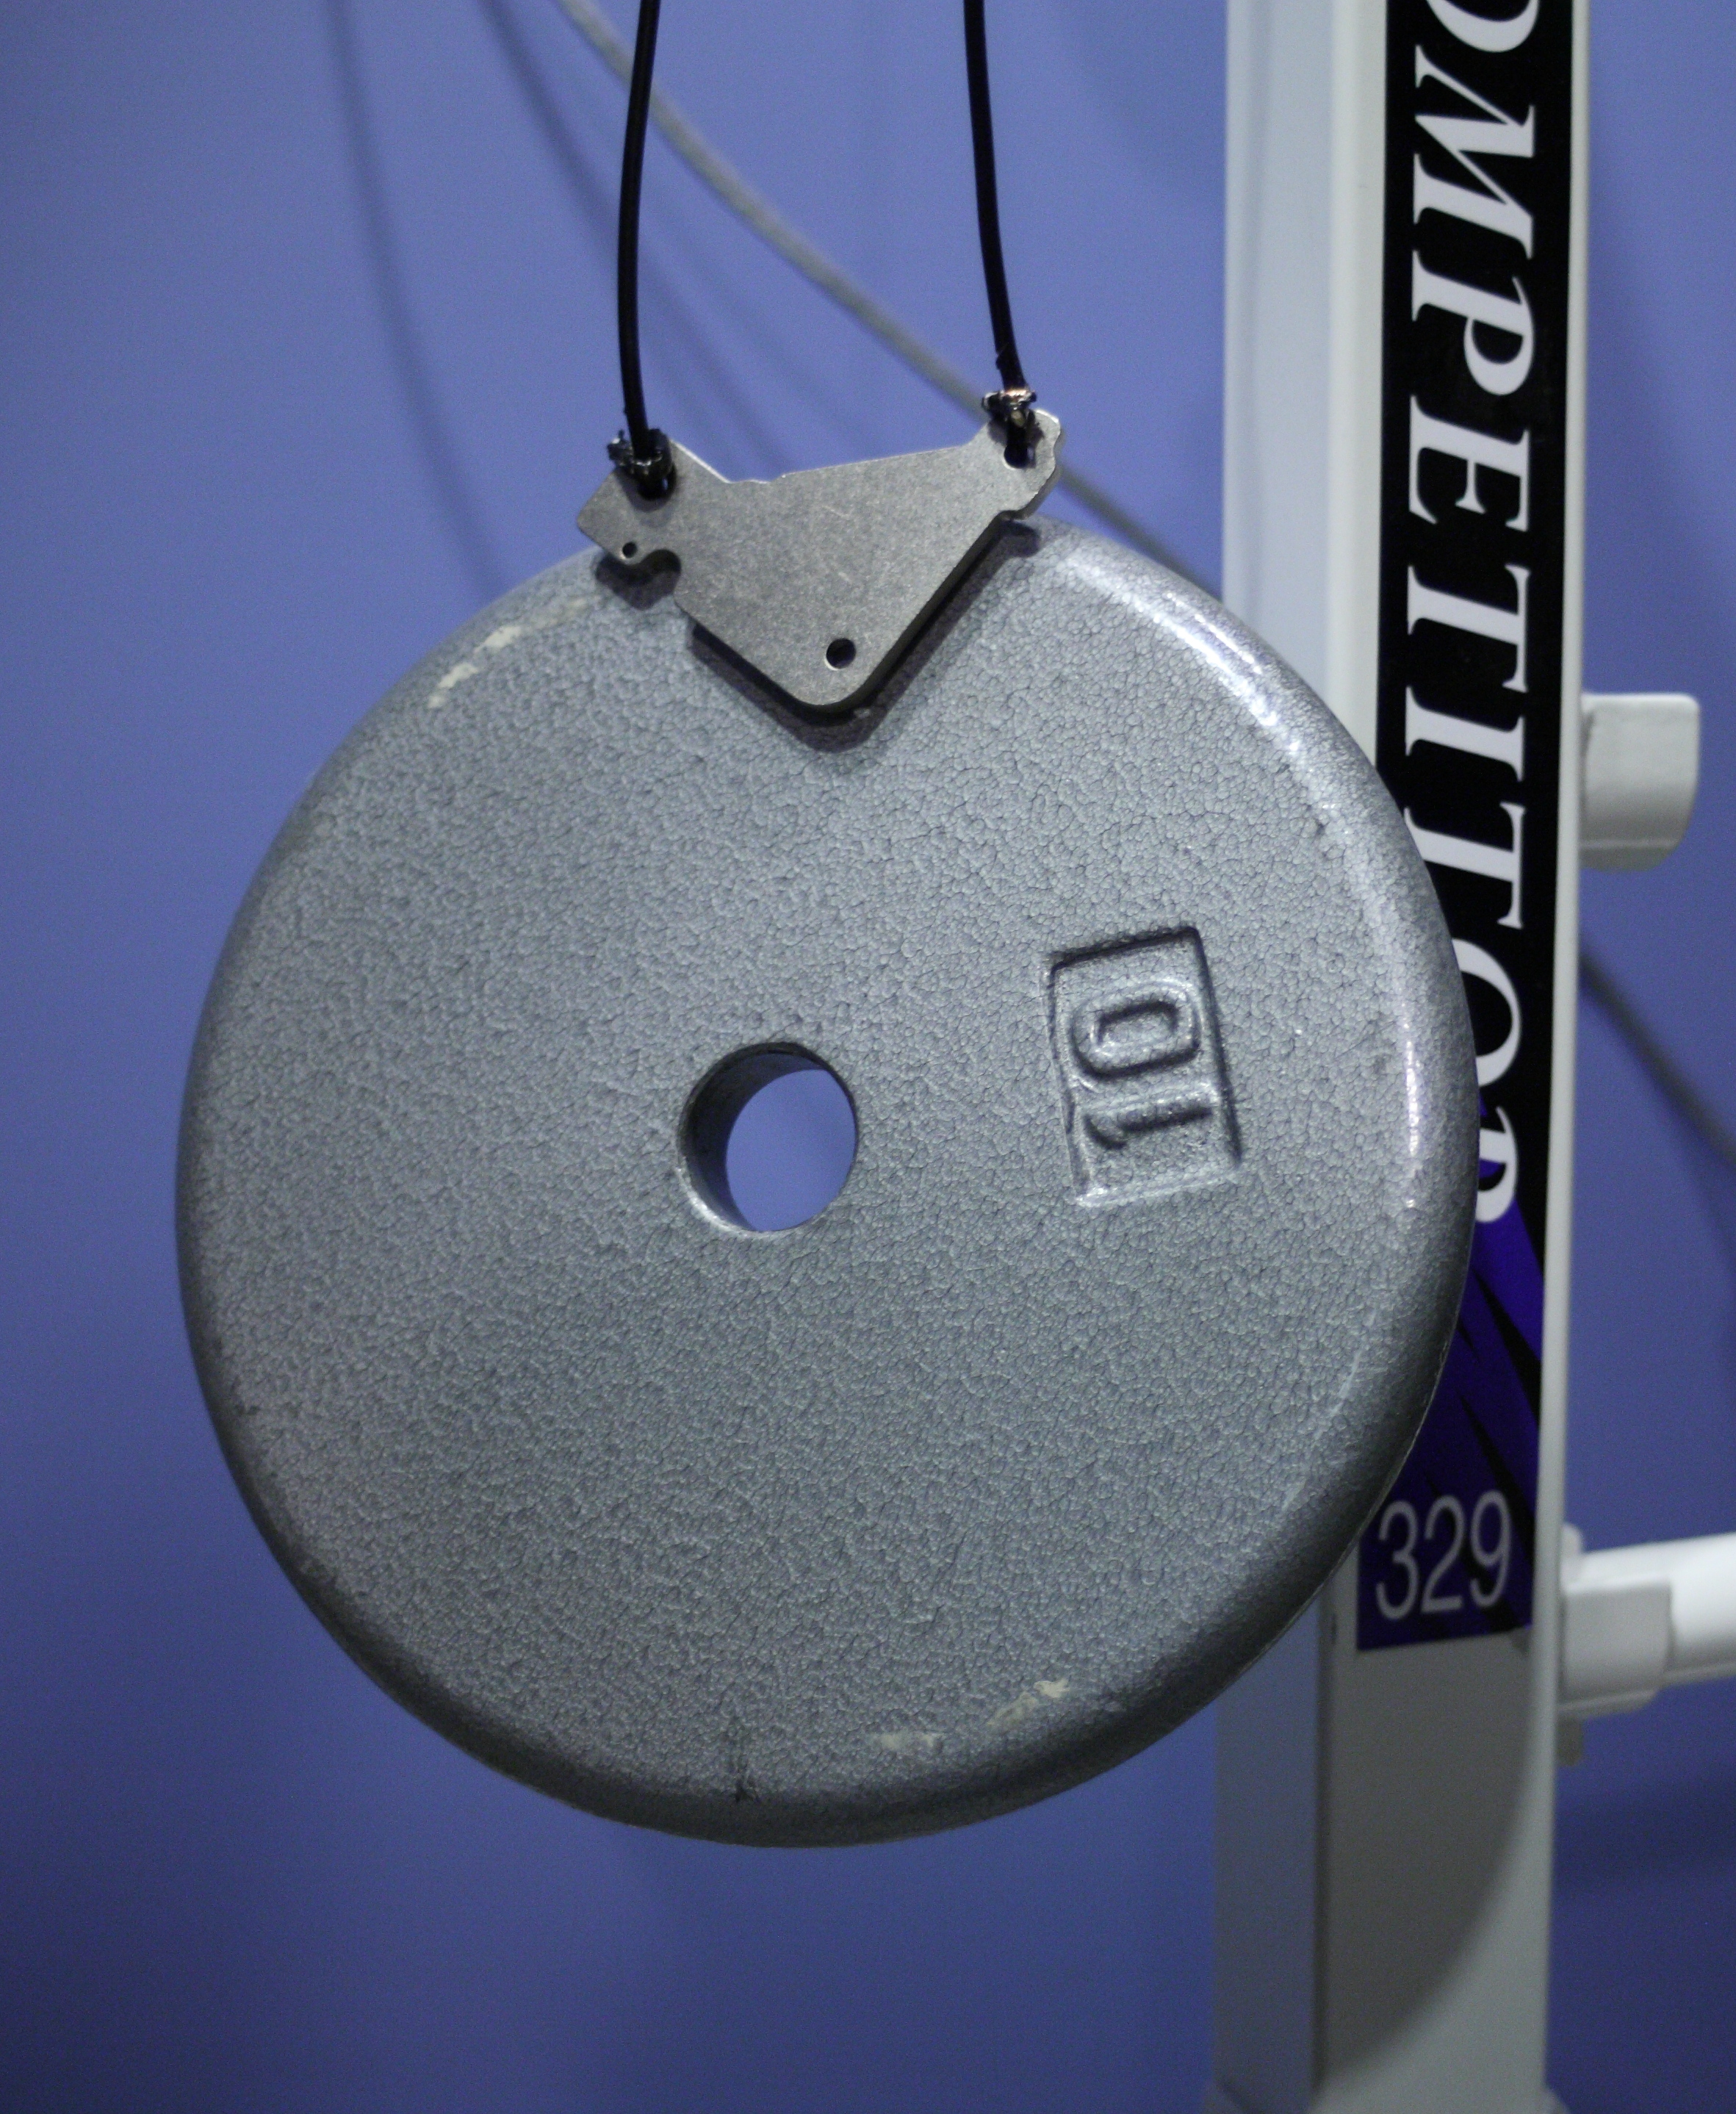
If you have a child ... ... that likes to take things apart, this can be some real fun for them. Though I will warn you - at least the first couple of times, you will want to supervise them. These are VERY POWERFUL magnets. As in "If I put it on my refrigerator raw, I won't be able to get it off the refrigerator without scratching it." "If my fingers get between the magnet and whatever metal it wants to attach to, my fingers will get pinched and I'll probably have a blood blister." "If I want to rip the hands off my watch without removing the crystal, these magnets will likely do that." "If I never want my magnetic stripe on the credit card to work again, this will quickly erase it." I have a photo of one of these holding up a 10 pound weight without breaking a sweat. Would probably do 15. (DAS: Note to insert a photo of the magnet holding the weight) Tools you will needMost households have 90% of everything you need. What you probably don't have are Torx bits and possibly "Tamper Proof Torx" bits. Torx look like stars. In an emergency, you can sometimes use a hex bit and wedge it in there. I picked up this little gem from Sears for less than $5. Torx bit sets are everywhere, just search around and you'll find them. With the bits, get a driver. An X-Acto knife also comes in handy. Pliers, or vice grips, or channel lock pliers to pull the magnet out. (DAS: Note to insert photo of various tools) What you'll end up with is a magnet that won't break a sweat holding a 10# weight in non-optimal position, as shown here:
It would hold more if it were horizontal instead of vertical ... It won't hold 20# this way, but I'll bet it would hold 15#. Meet the drives!Pictured below are 4 hard drives of various manufacturers and vintages. Most households have 90% of everything you need. What you probably don't have are Torx bits and possibly "Tamper Proof Torx" bits. Torx look like 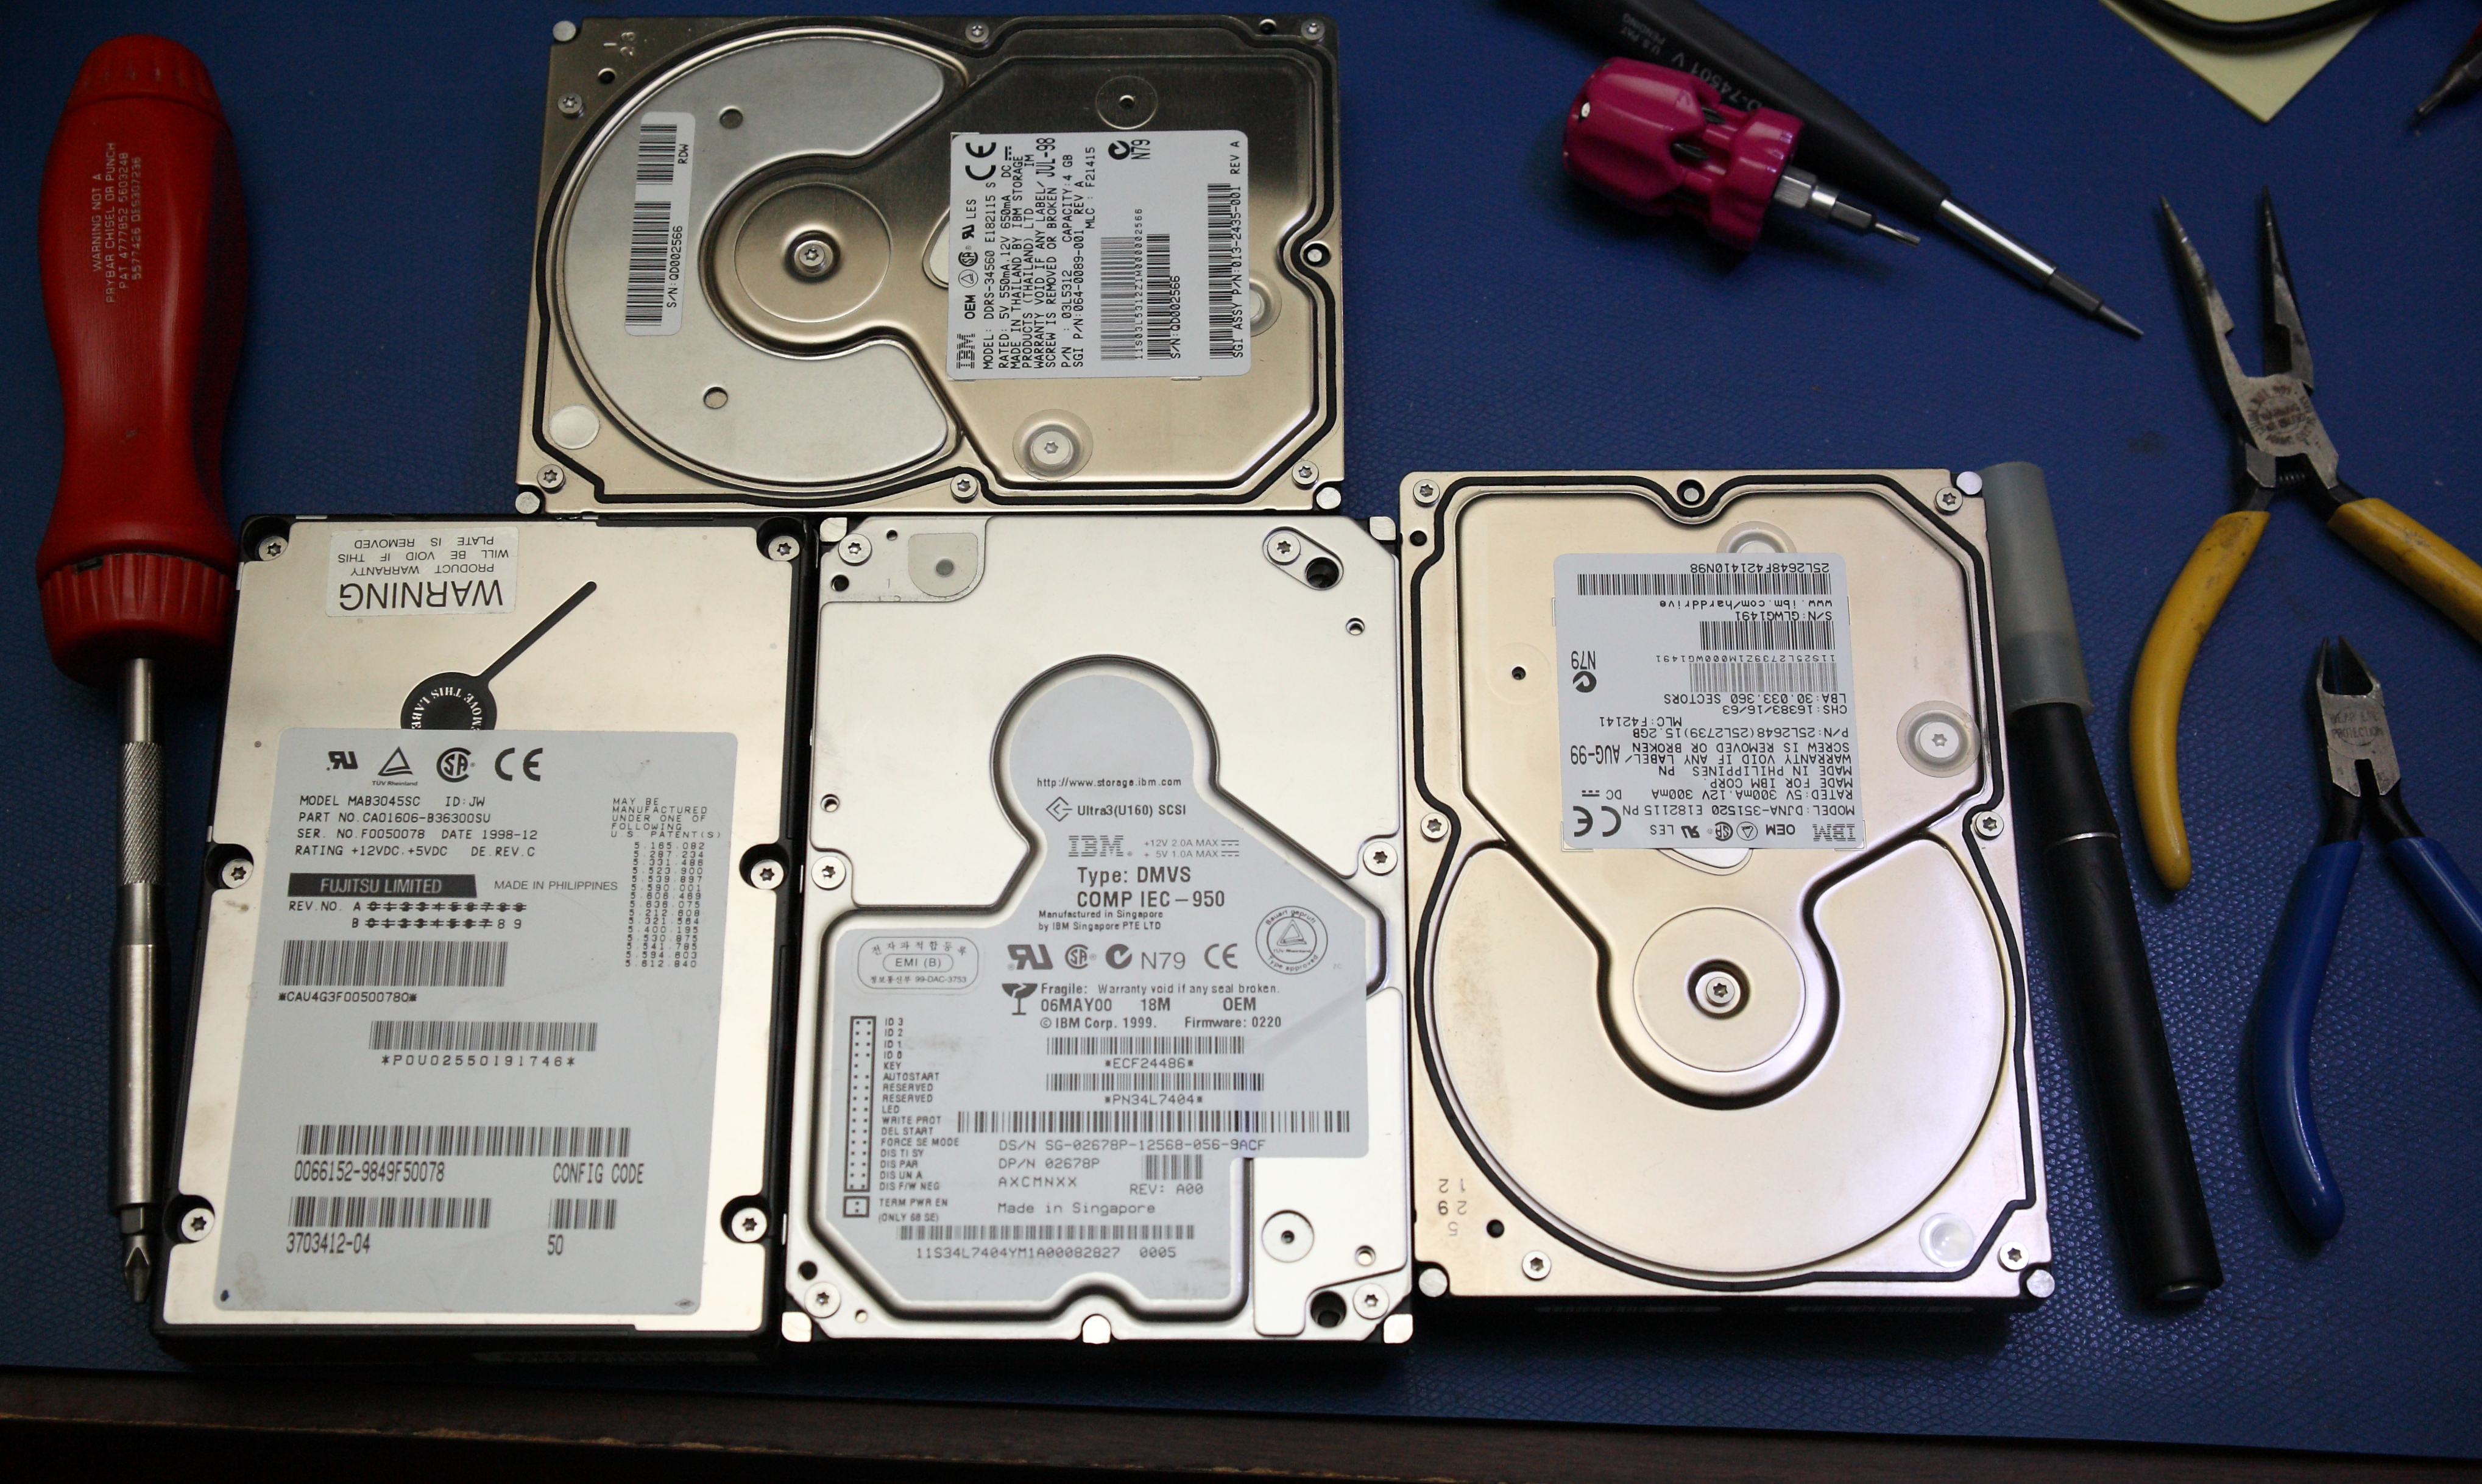 On top is a 4 GB drive made by IBM, which I did not end up taking apart this session as I already had enough. Across the bottom, left to right is a drive from Fujitsu (MAB3045SC), a drive from IBM (02678P), and a different IBM p/n 25L2648 (25L2739). All the drives are various flavors of SCSI drives I purchased and used when I setup a lab for the MDOT Intelligent Traffic System and wanted a lab I could use to test before deploying on the real system. That was another lifetime ago - all these drives date from somewhere around 1998 to 2000 and are long past their useful life. To begin, follow these general rules: "If you see a screw, remove it." If you see a sticker or label that says "Warranty void if label is removed or tampered with", then remove and / or tamper with the label! Cut around it with the x-acto or cut an X shape and peel things back. Most screws will be pretty obvious. Some will almost always be hidden. Hold the drive at an angle and feel with your finger, many times you will feel or see a small depression where the label covers a screw. Here are a few examples, I circled the hidden screws in red: 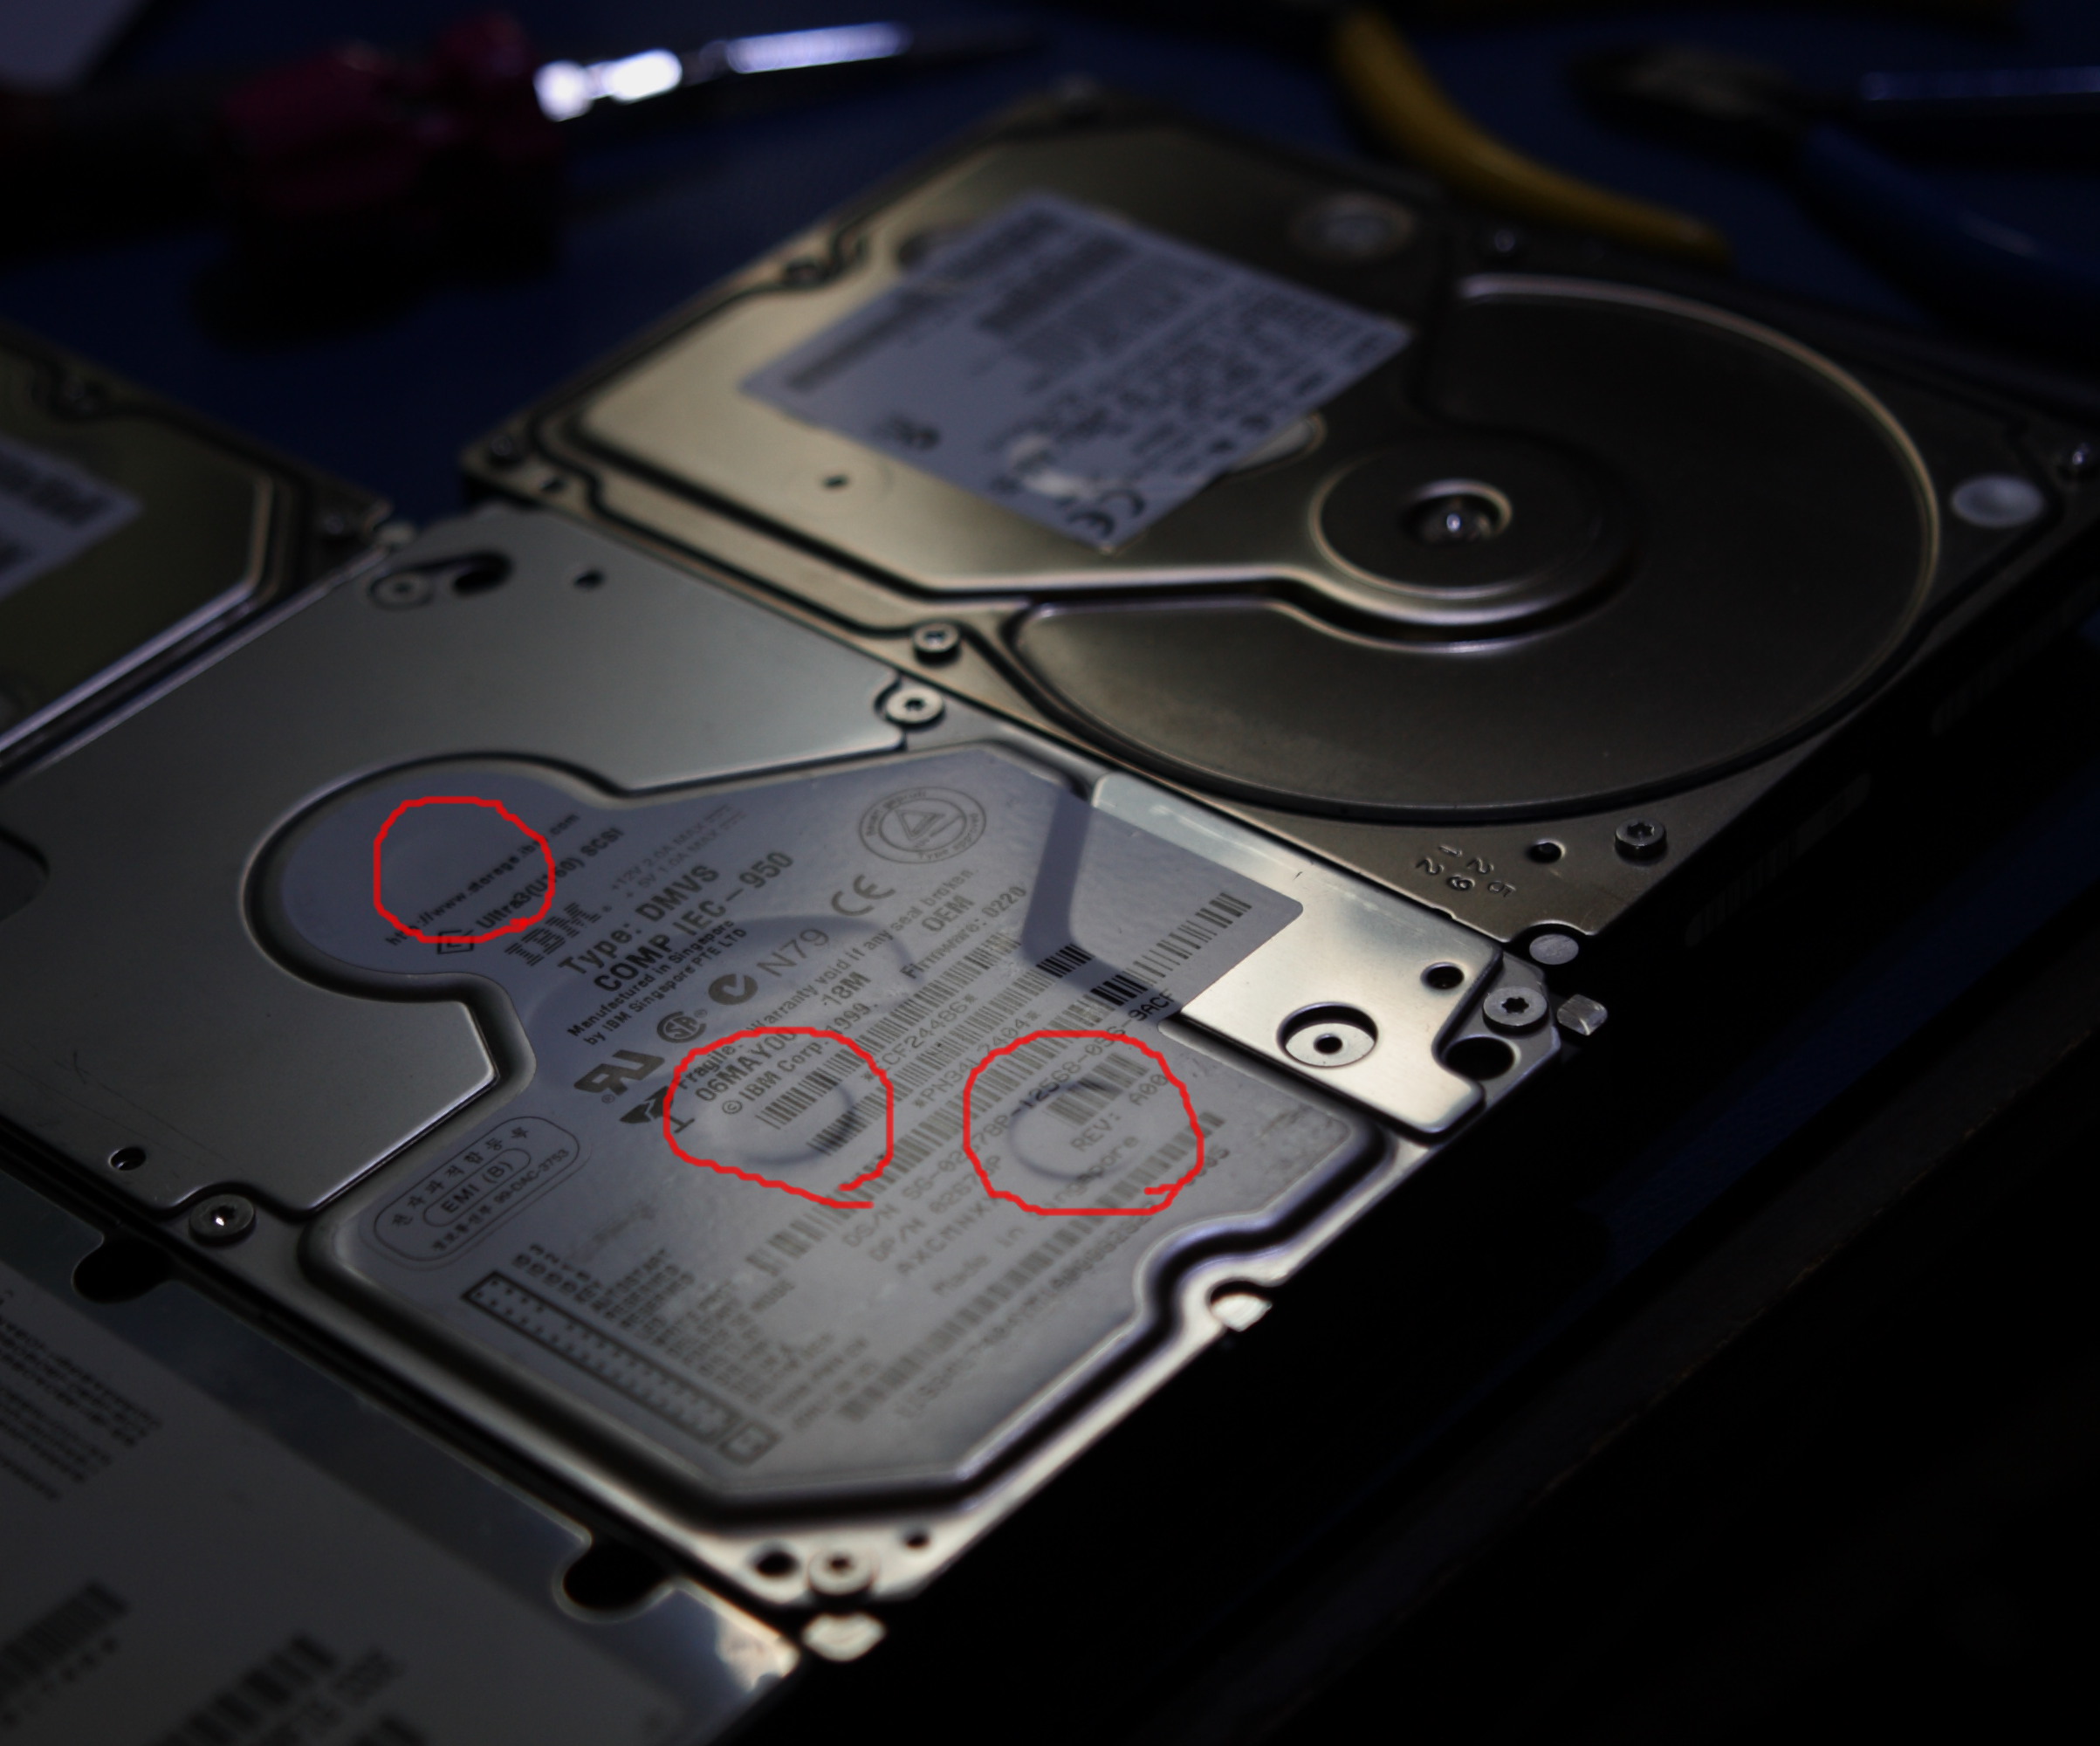 And a few more examples: 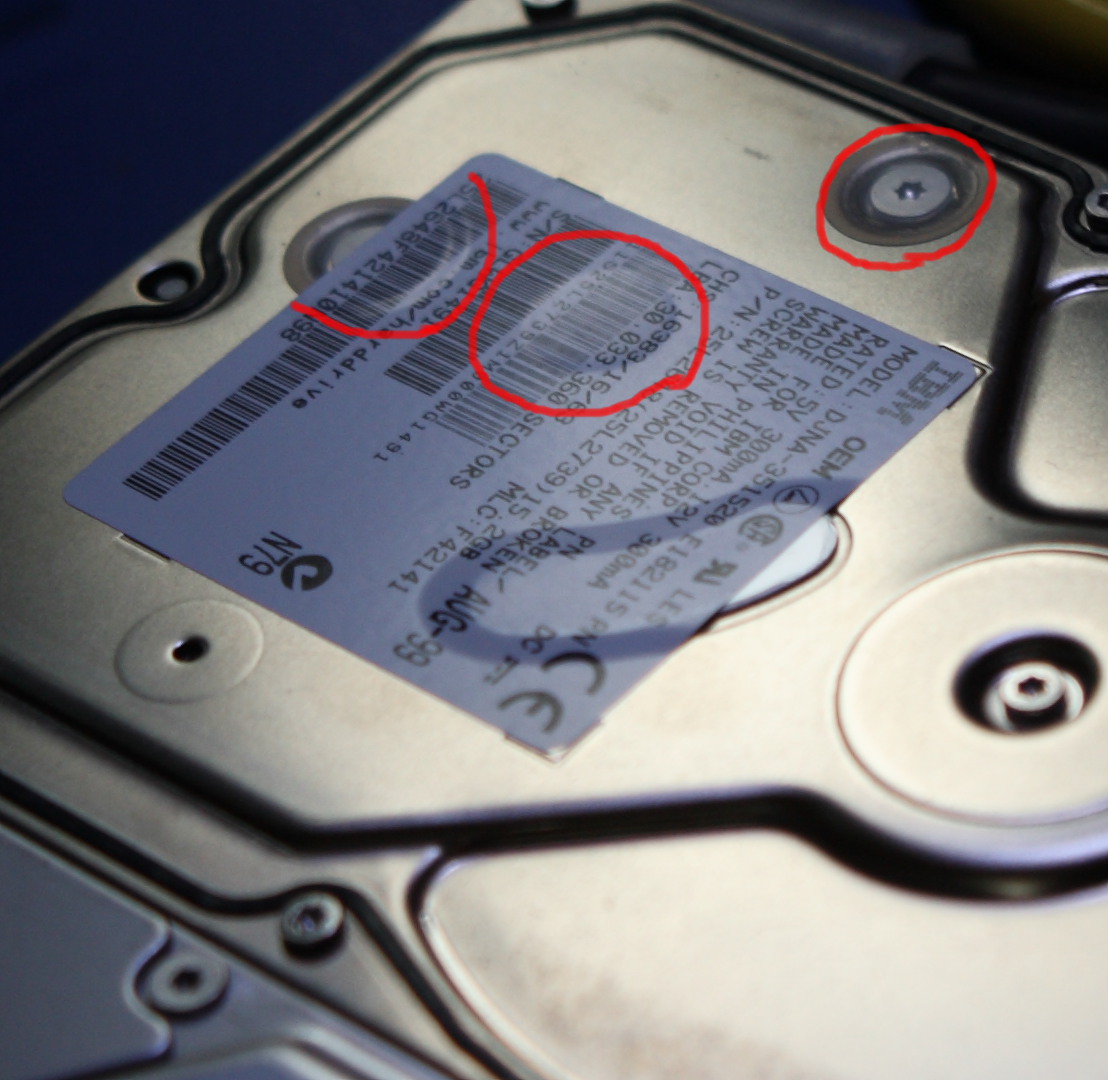 Here are all the screws I pulled out, also circled in red: 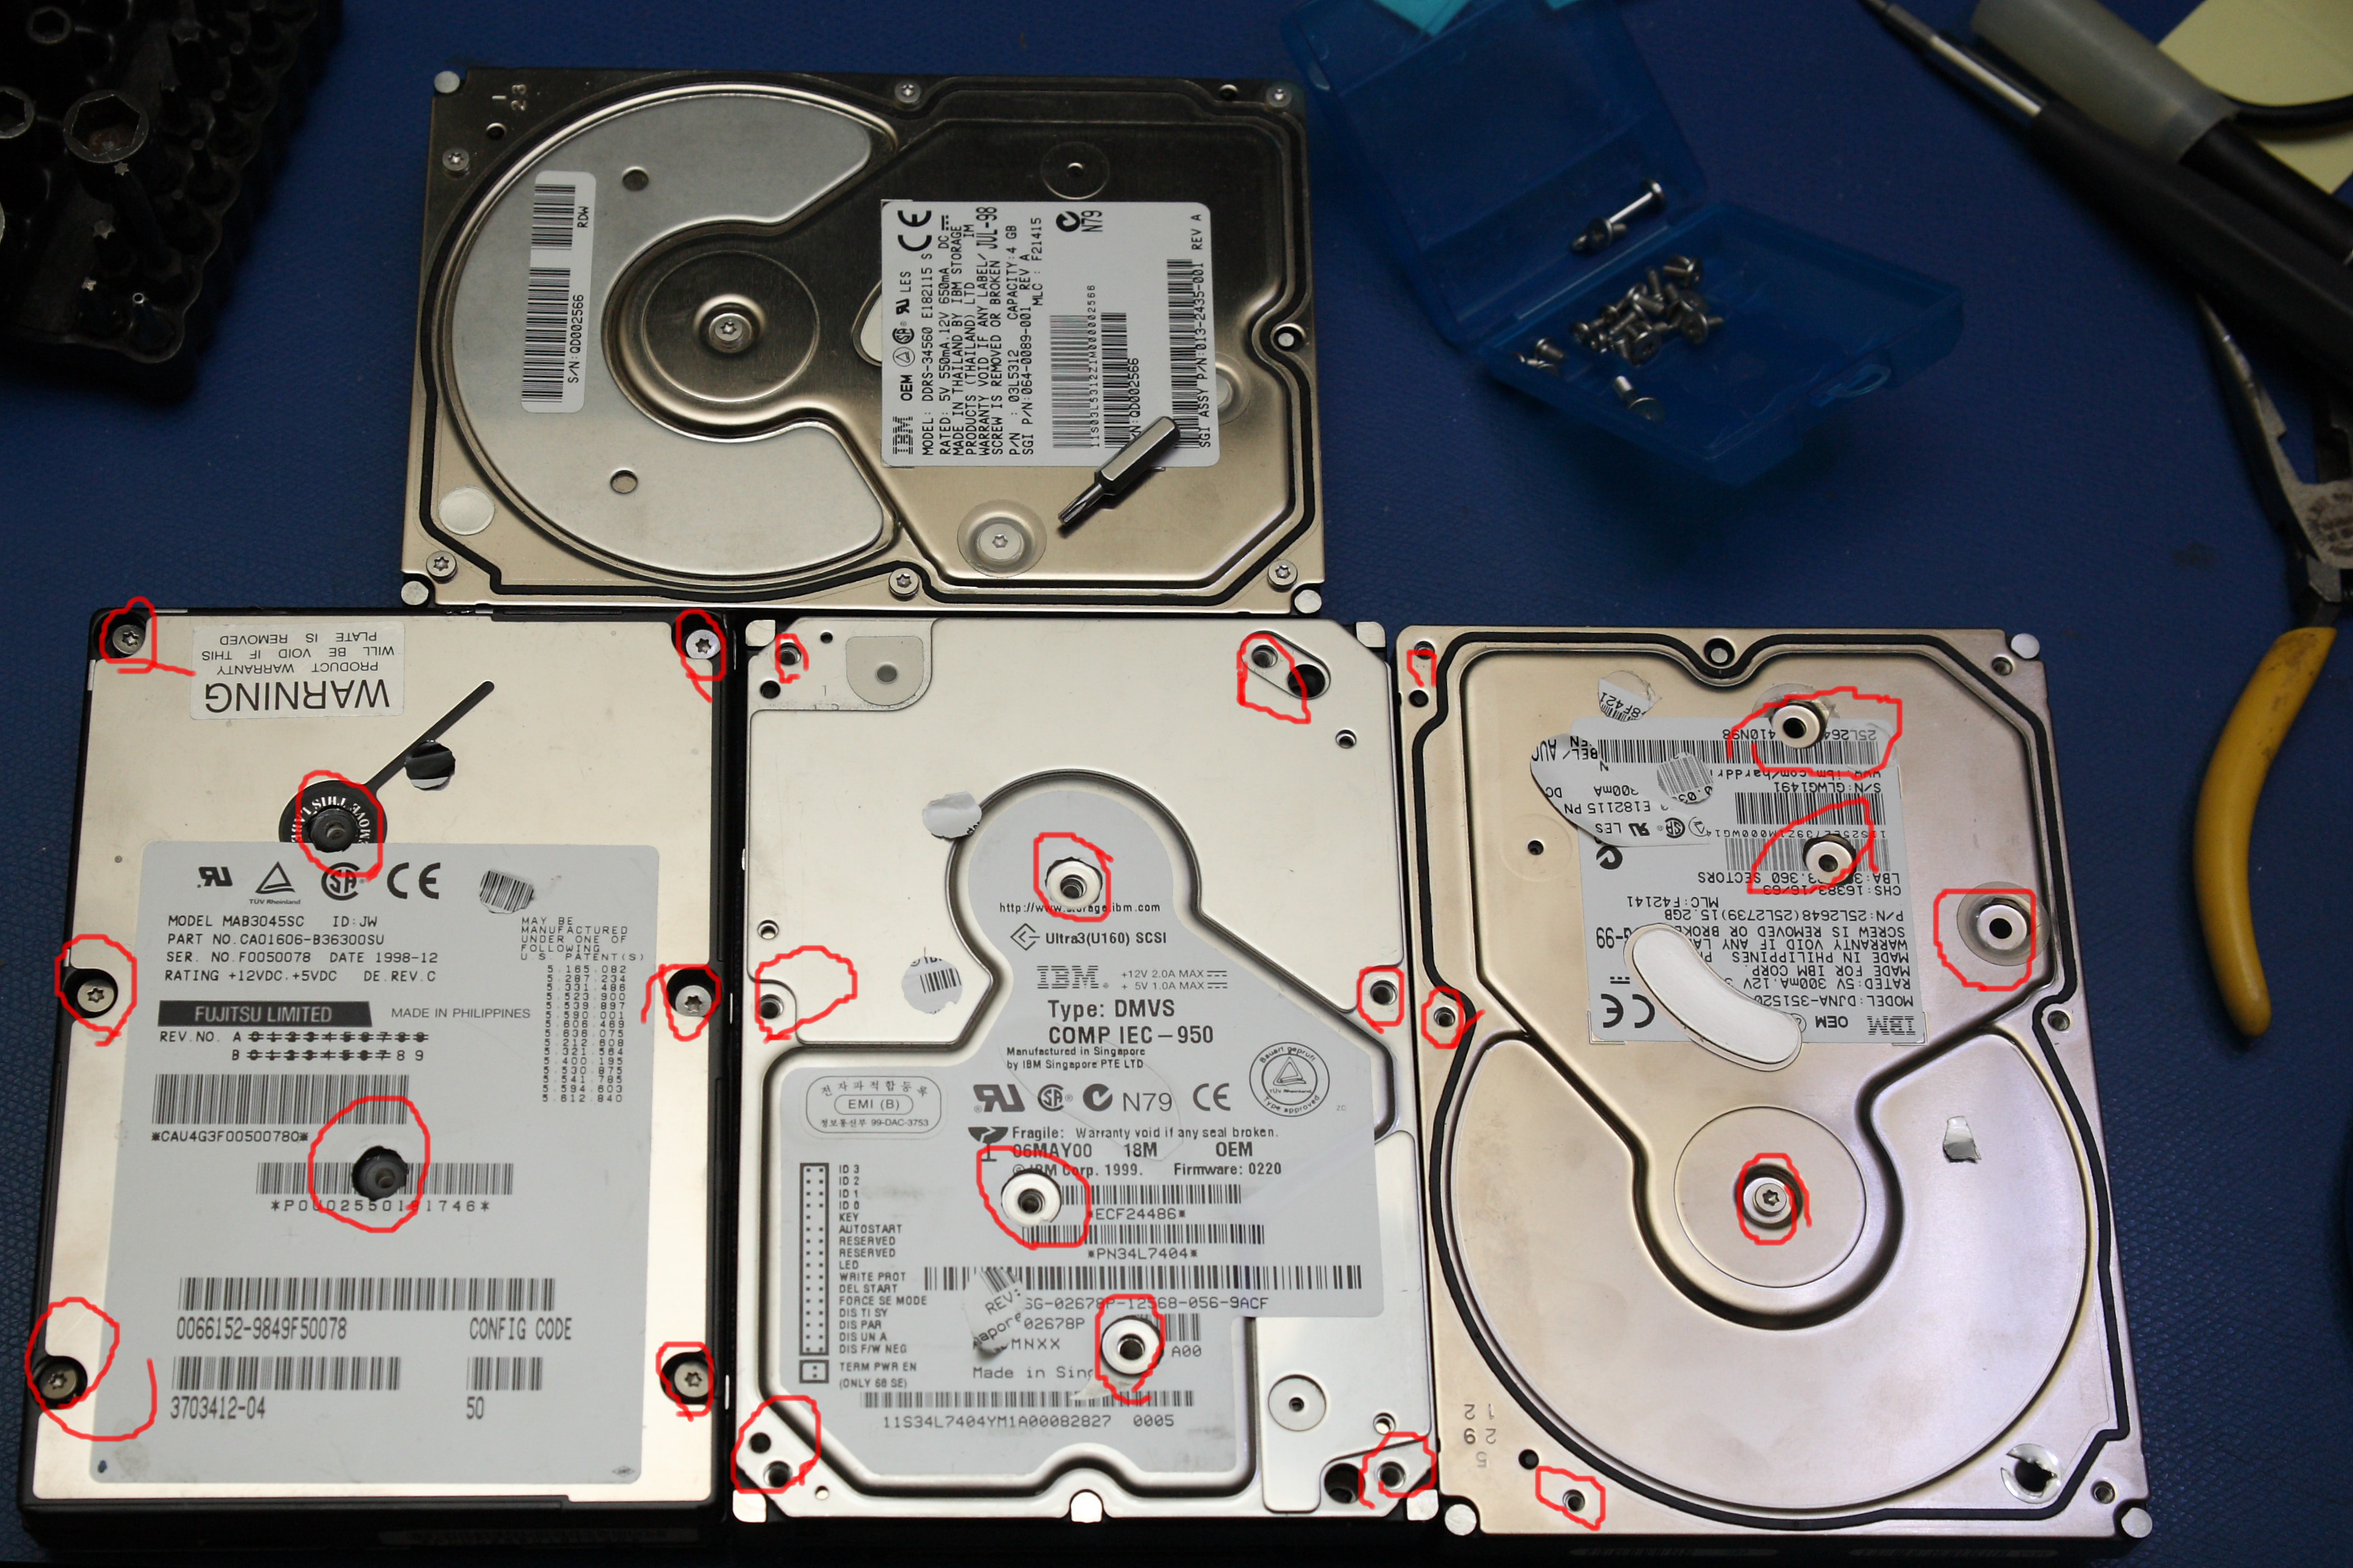 Once you have all the screws out, start to pry up on a corner and see if the lid pops off. It should be pretty easy ... unless you have a drive with a tape strip around the entire drive that is also sealing the top to the bottom. Many of the older 4 GB Western Digital Caviar drives have such a tape. Shown below, the right drive's cover popped right off... but the middle one wouldn't.  You can see the right drive cover is off but the middle isn't prying up easily. As it turns out, I missed a screw. The red handle capped screwdriver's tip is pointing at the label where another Torx screw is hiding. I was a little over-zealous with the red circle pen... 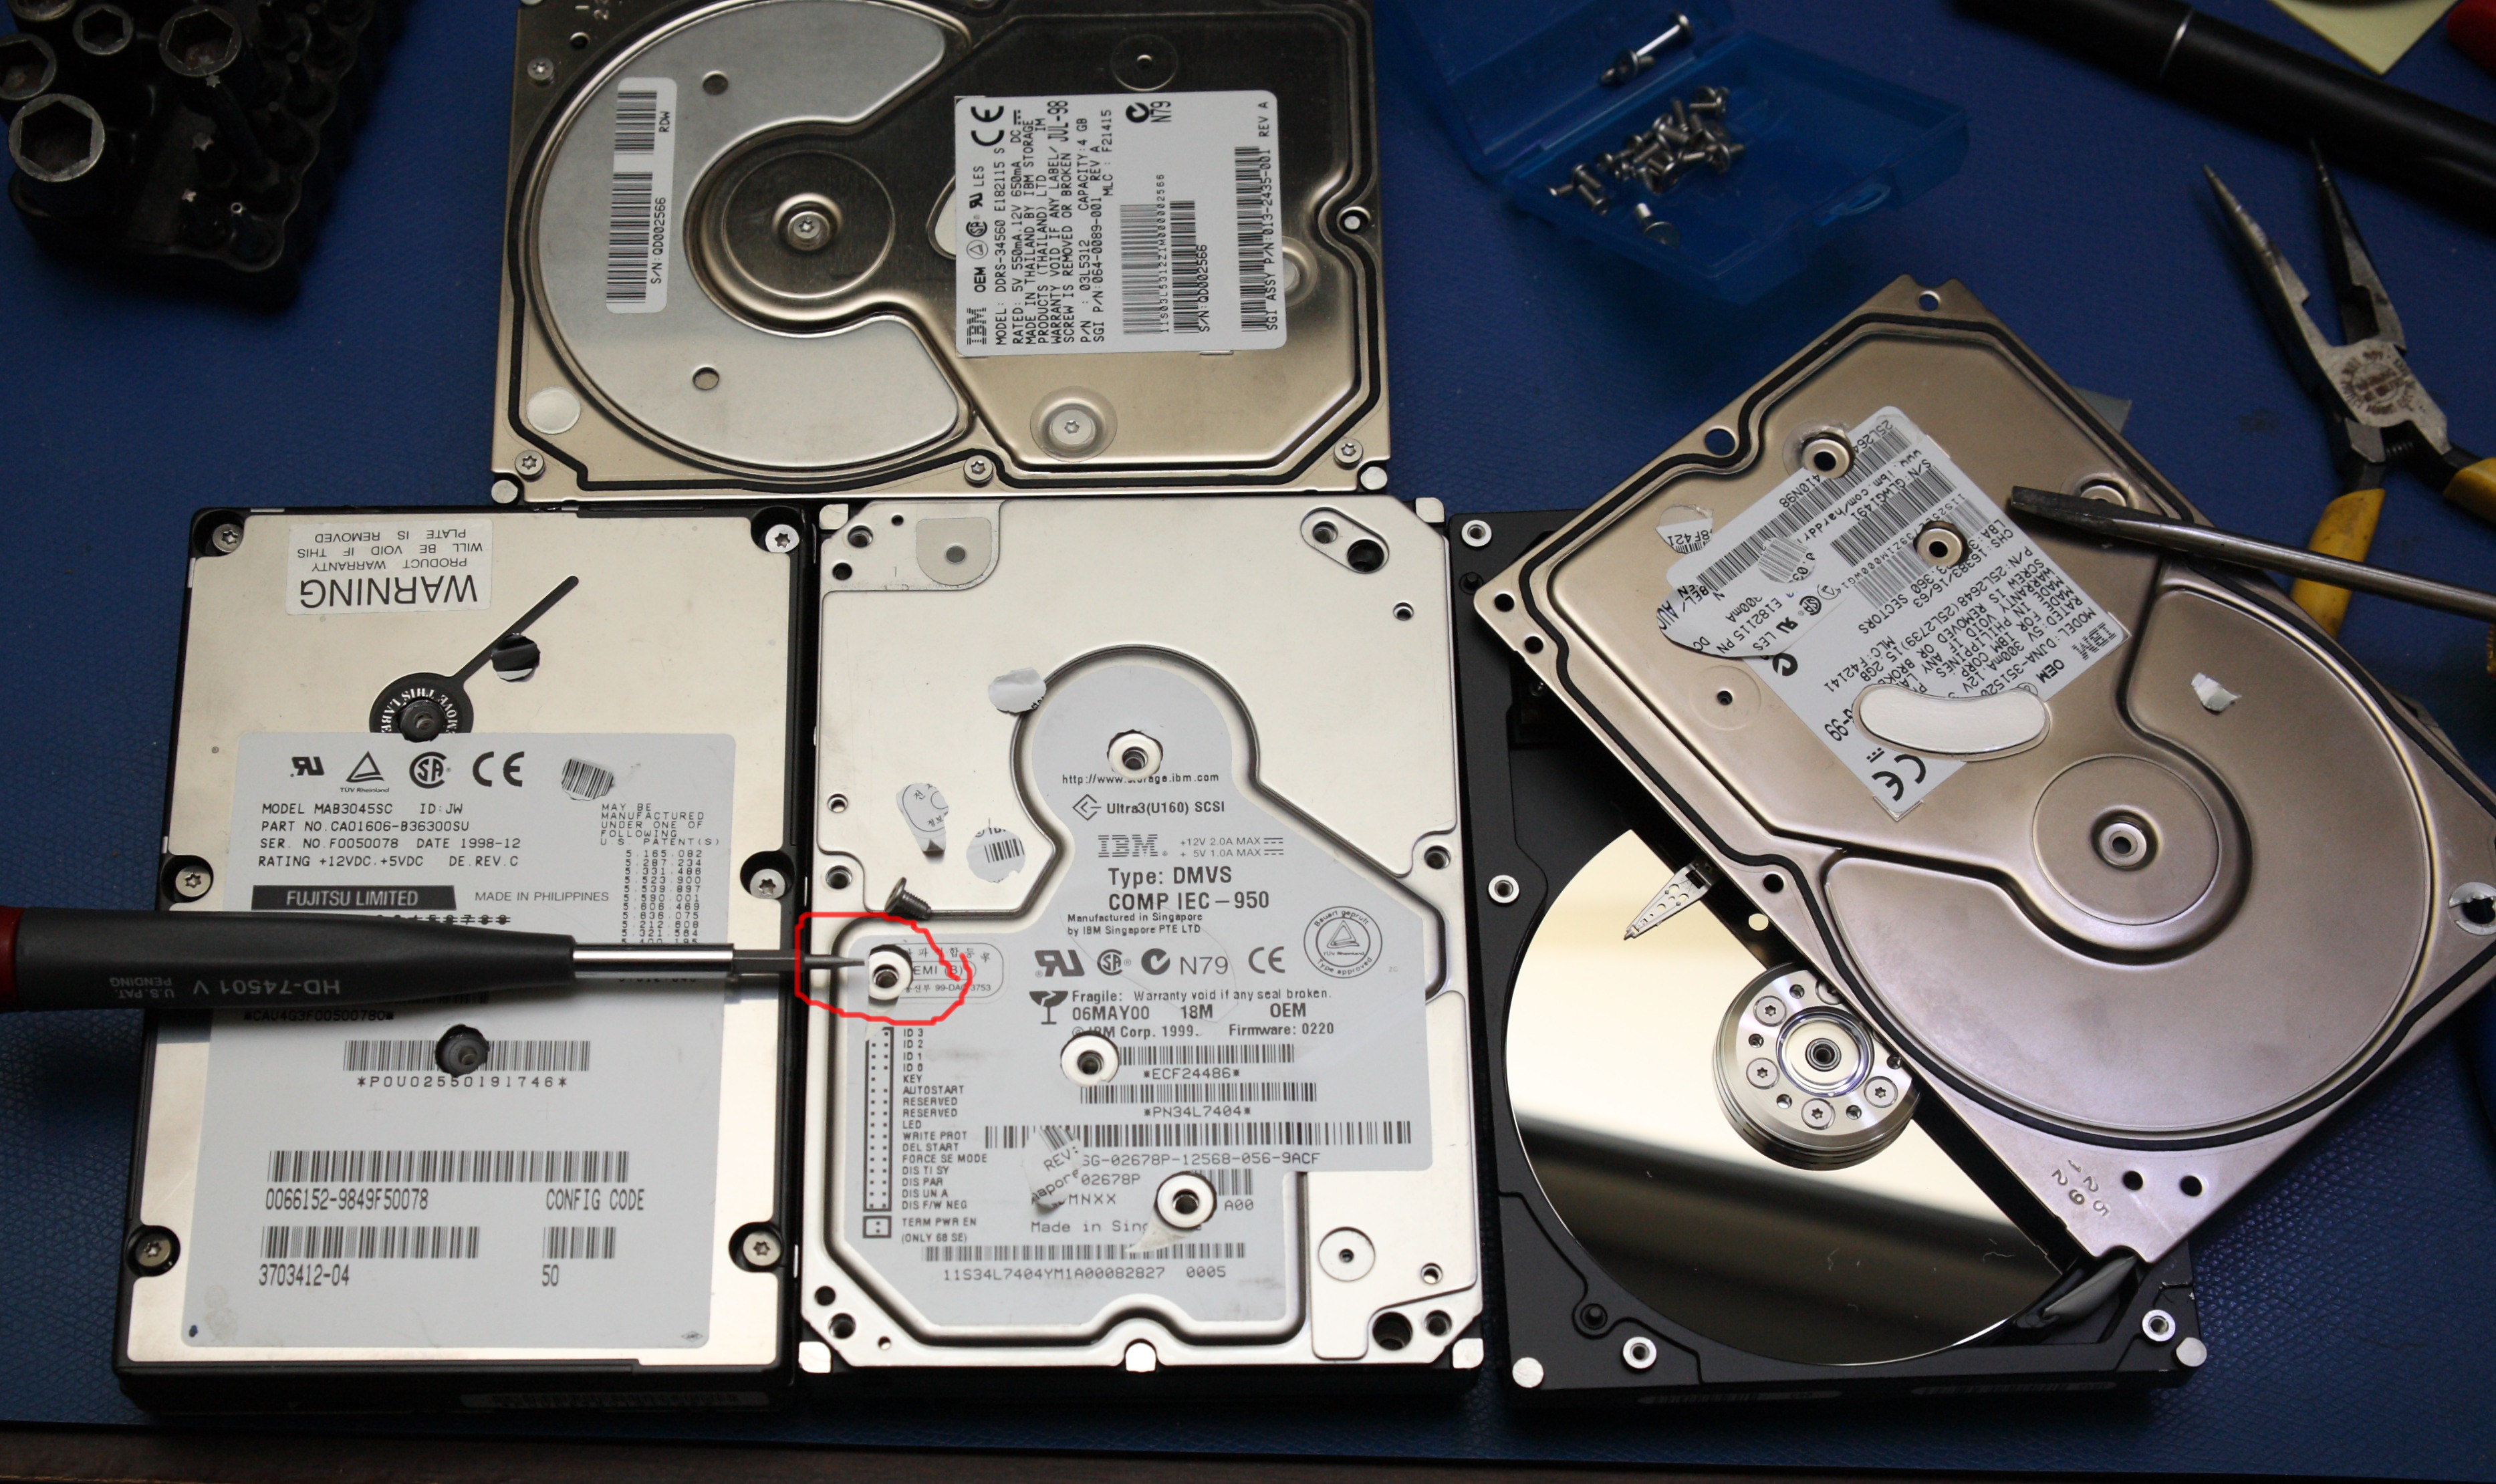 This shows the hidden screw, now removed! 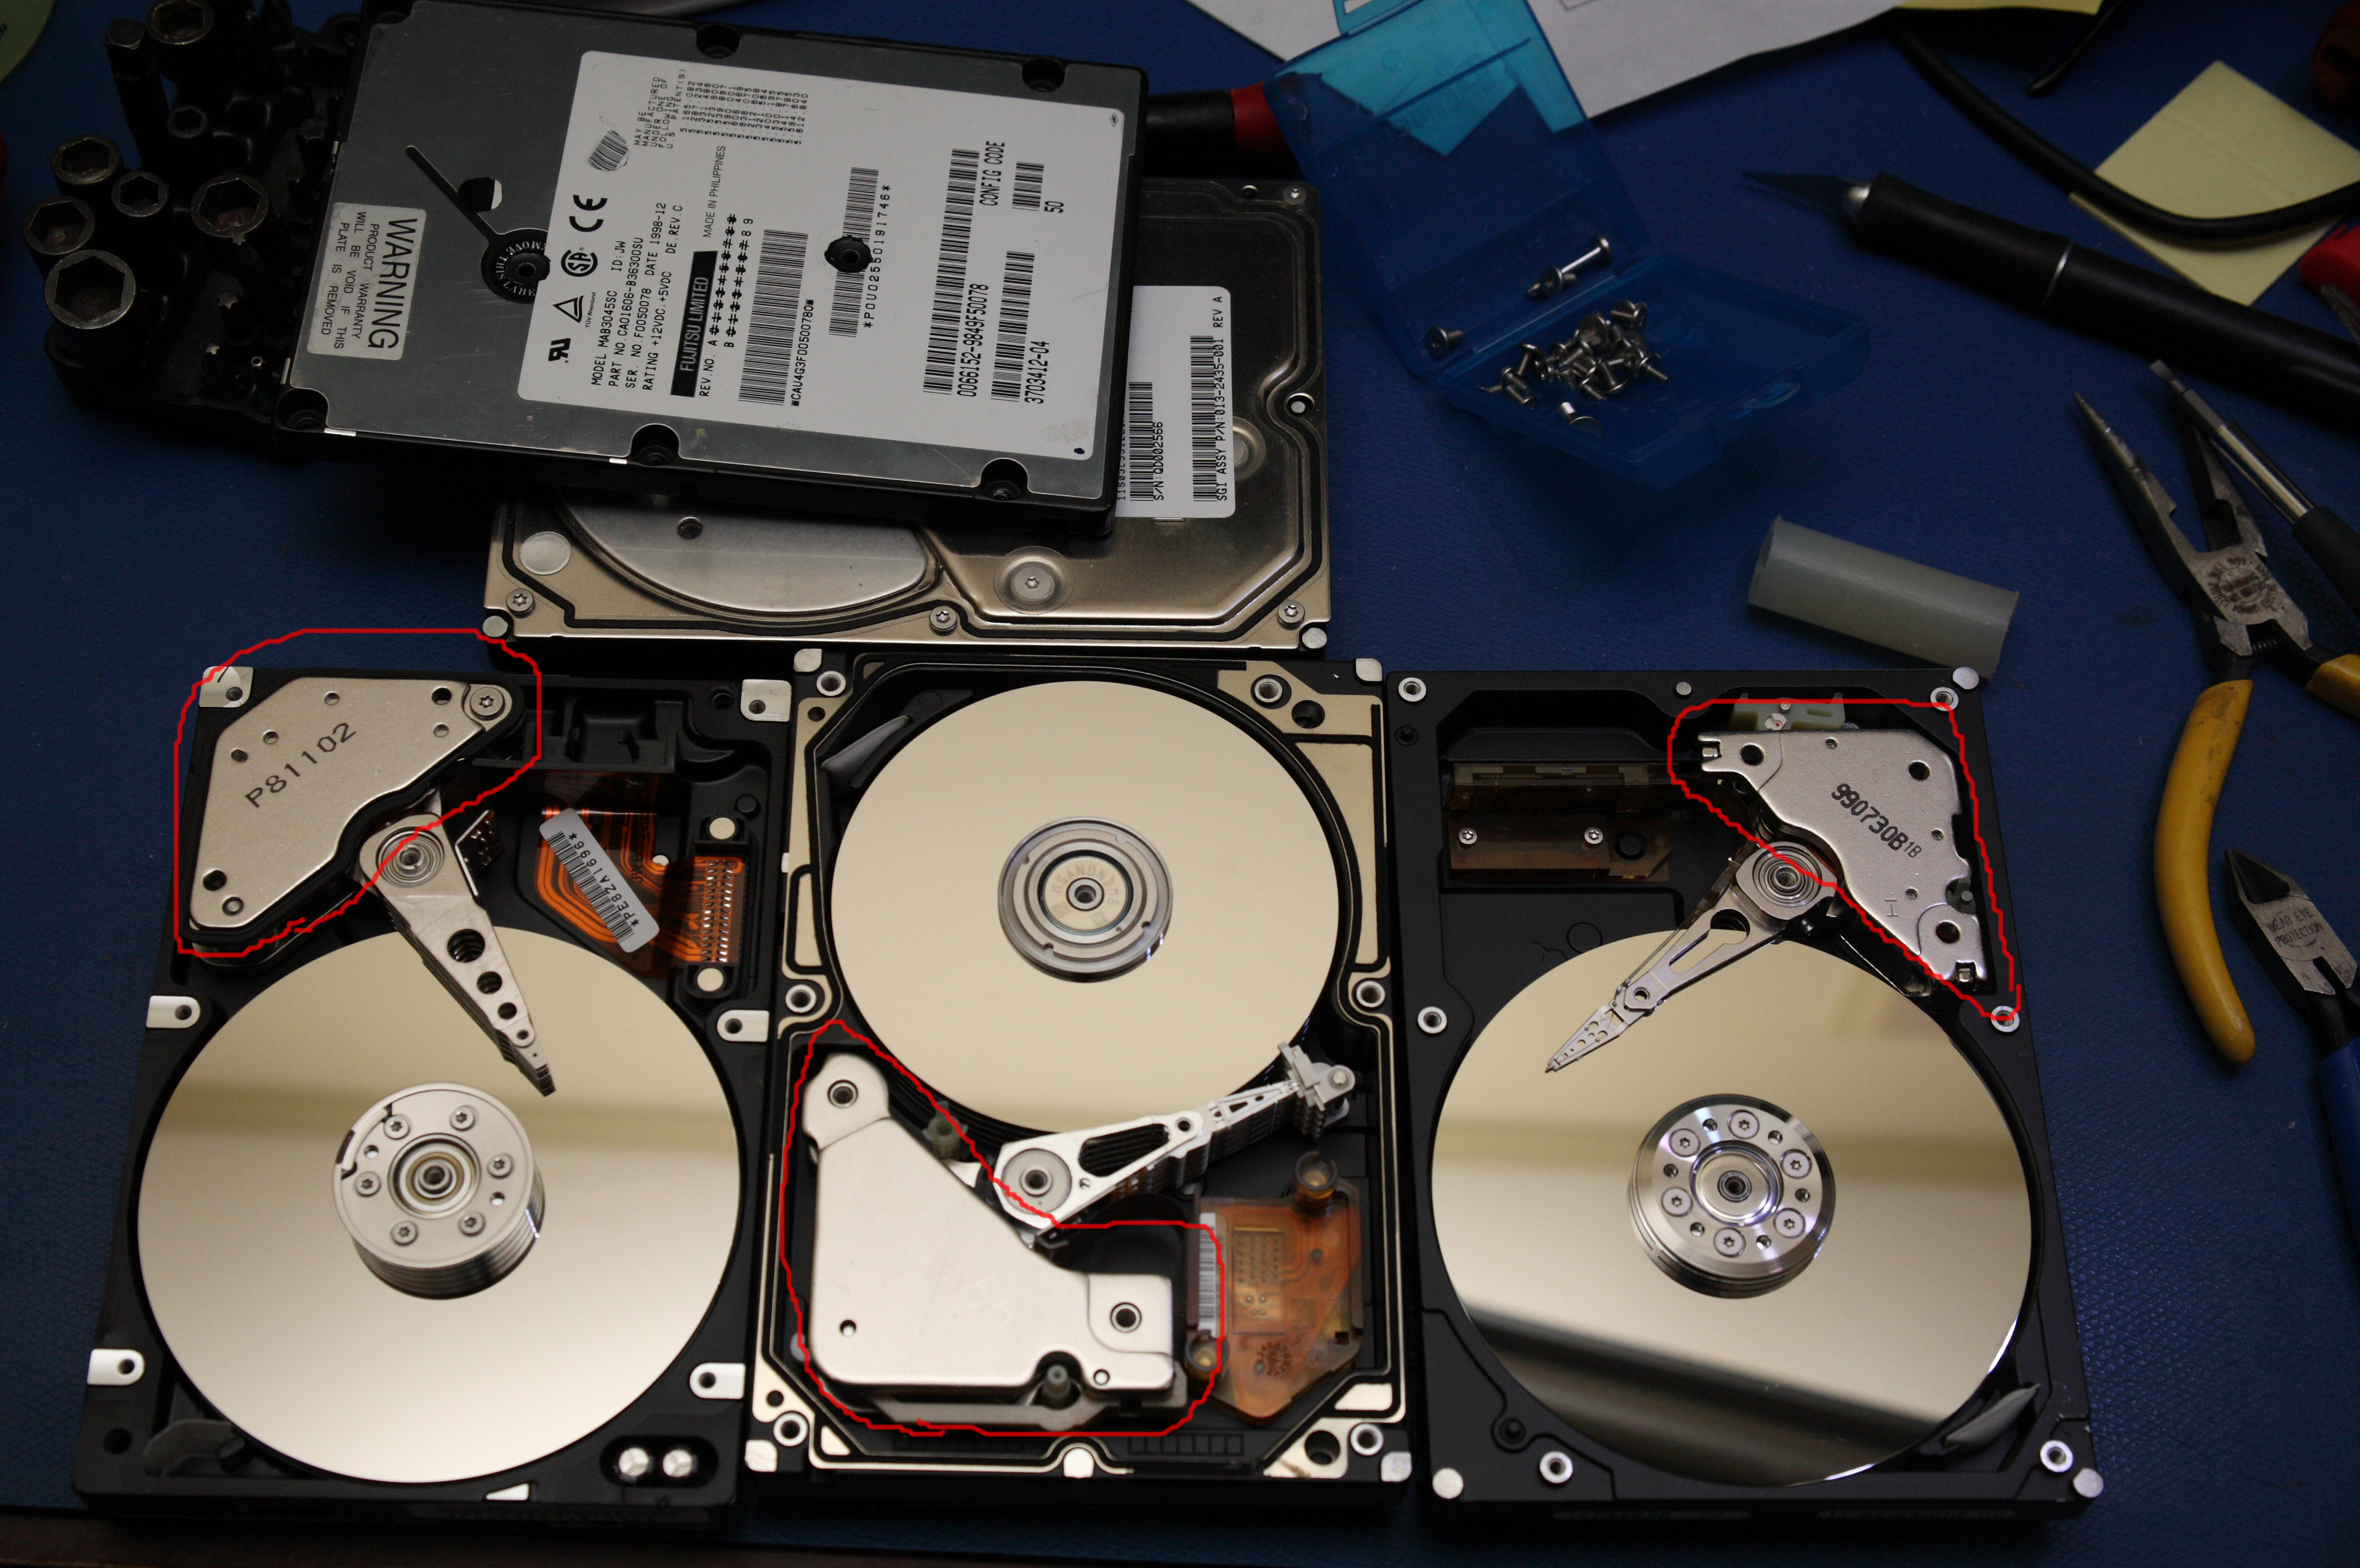 Circled in red are our 3 locations where the magnets are. I could go into detail about all the parts, what they do, etc. but if you are reading this you probably don't want that stuff. But if you do, write me and if I see enough interest I do a "drive internals" article. FYI: That circular disk - all the of them - actually hold your data. The disks spins somewhere between 5000 and 15000 revolutions per minute (RPM) and the head floats less than a hair width above the surface. When you put your notebook down hard on a surface, you bounce the head off the surface of the disk. Each time, you risk damaging the data where the head contacts the disk. So don't do it! I've seen more drives killed and more data lost by people who don't know that about hard drives than I care to mention. But again, this isn't an article on drives and data recovery - this is on data destruction and pulling out cool magnets. So onward... Look and see if you can pry the magnet up or not. Sometimes there are other things holding them in place. In the cast of the right drive, I could pry it up with a screwdriver: 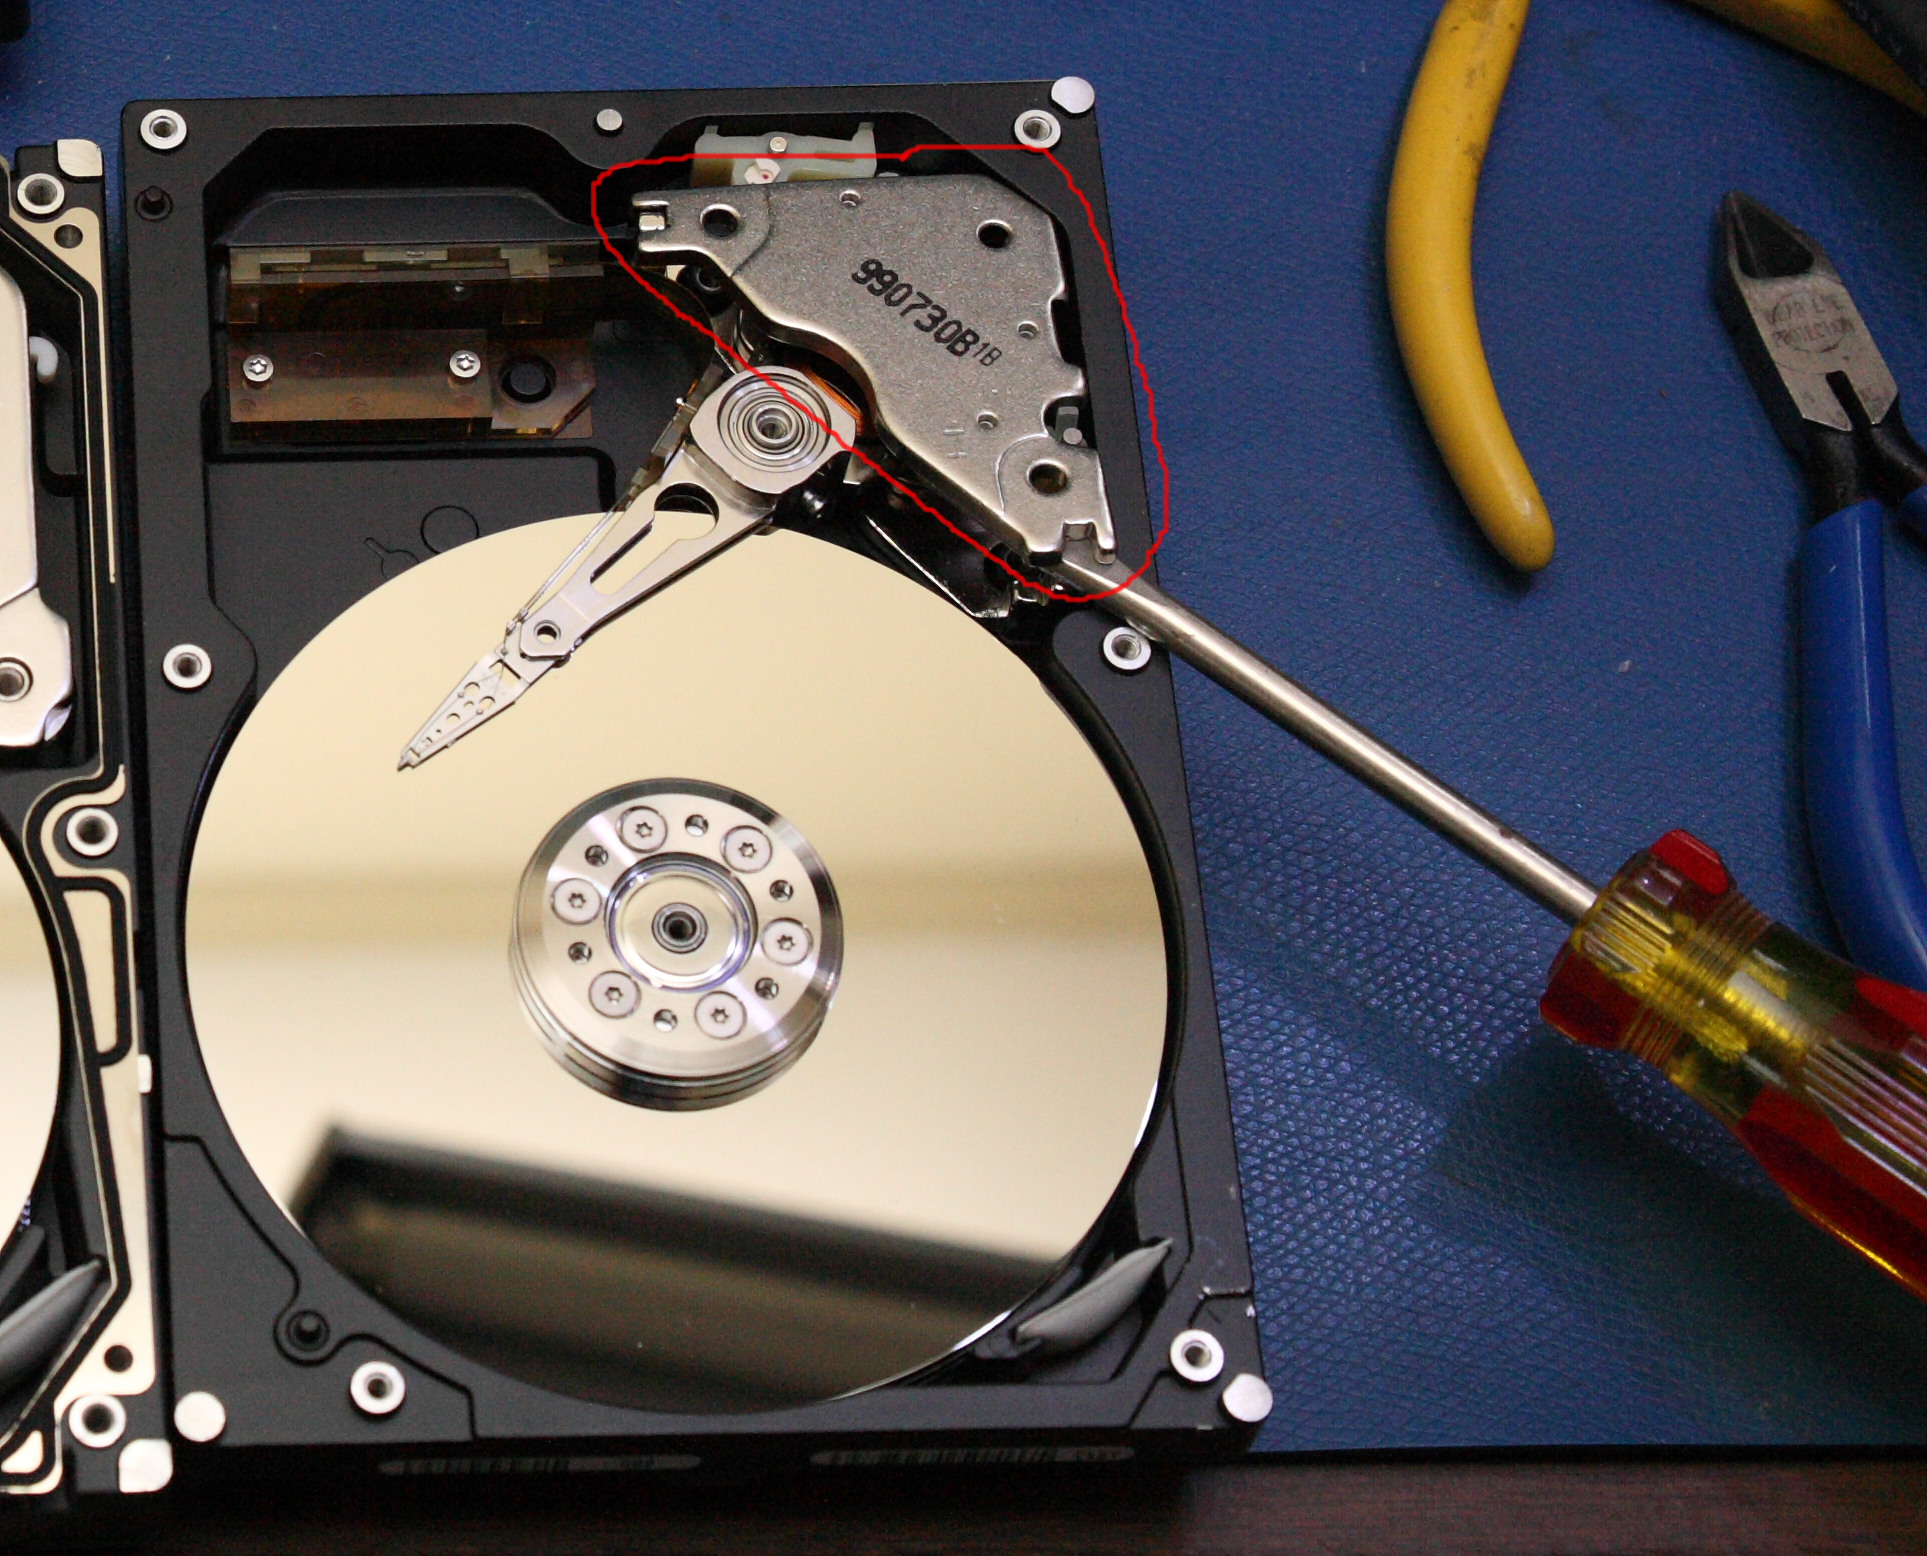 Except it was too powerful and I didn't want to pinch my fingers... so I grabbed the vice grip pliers and pulled it off that way: 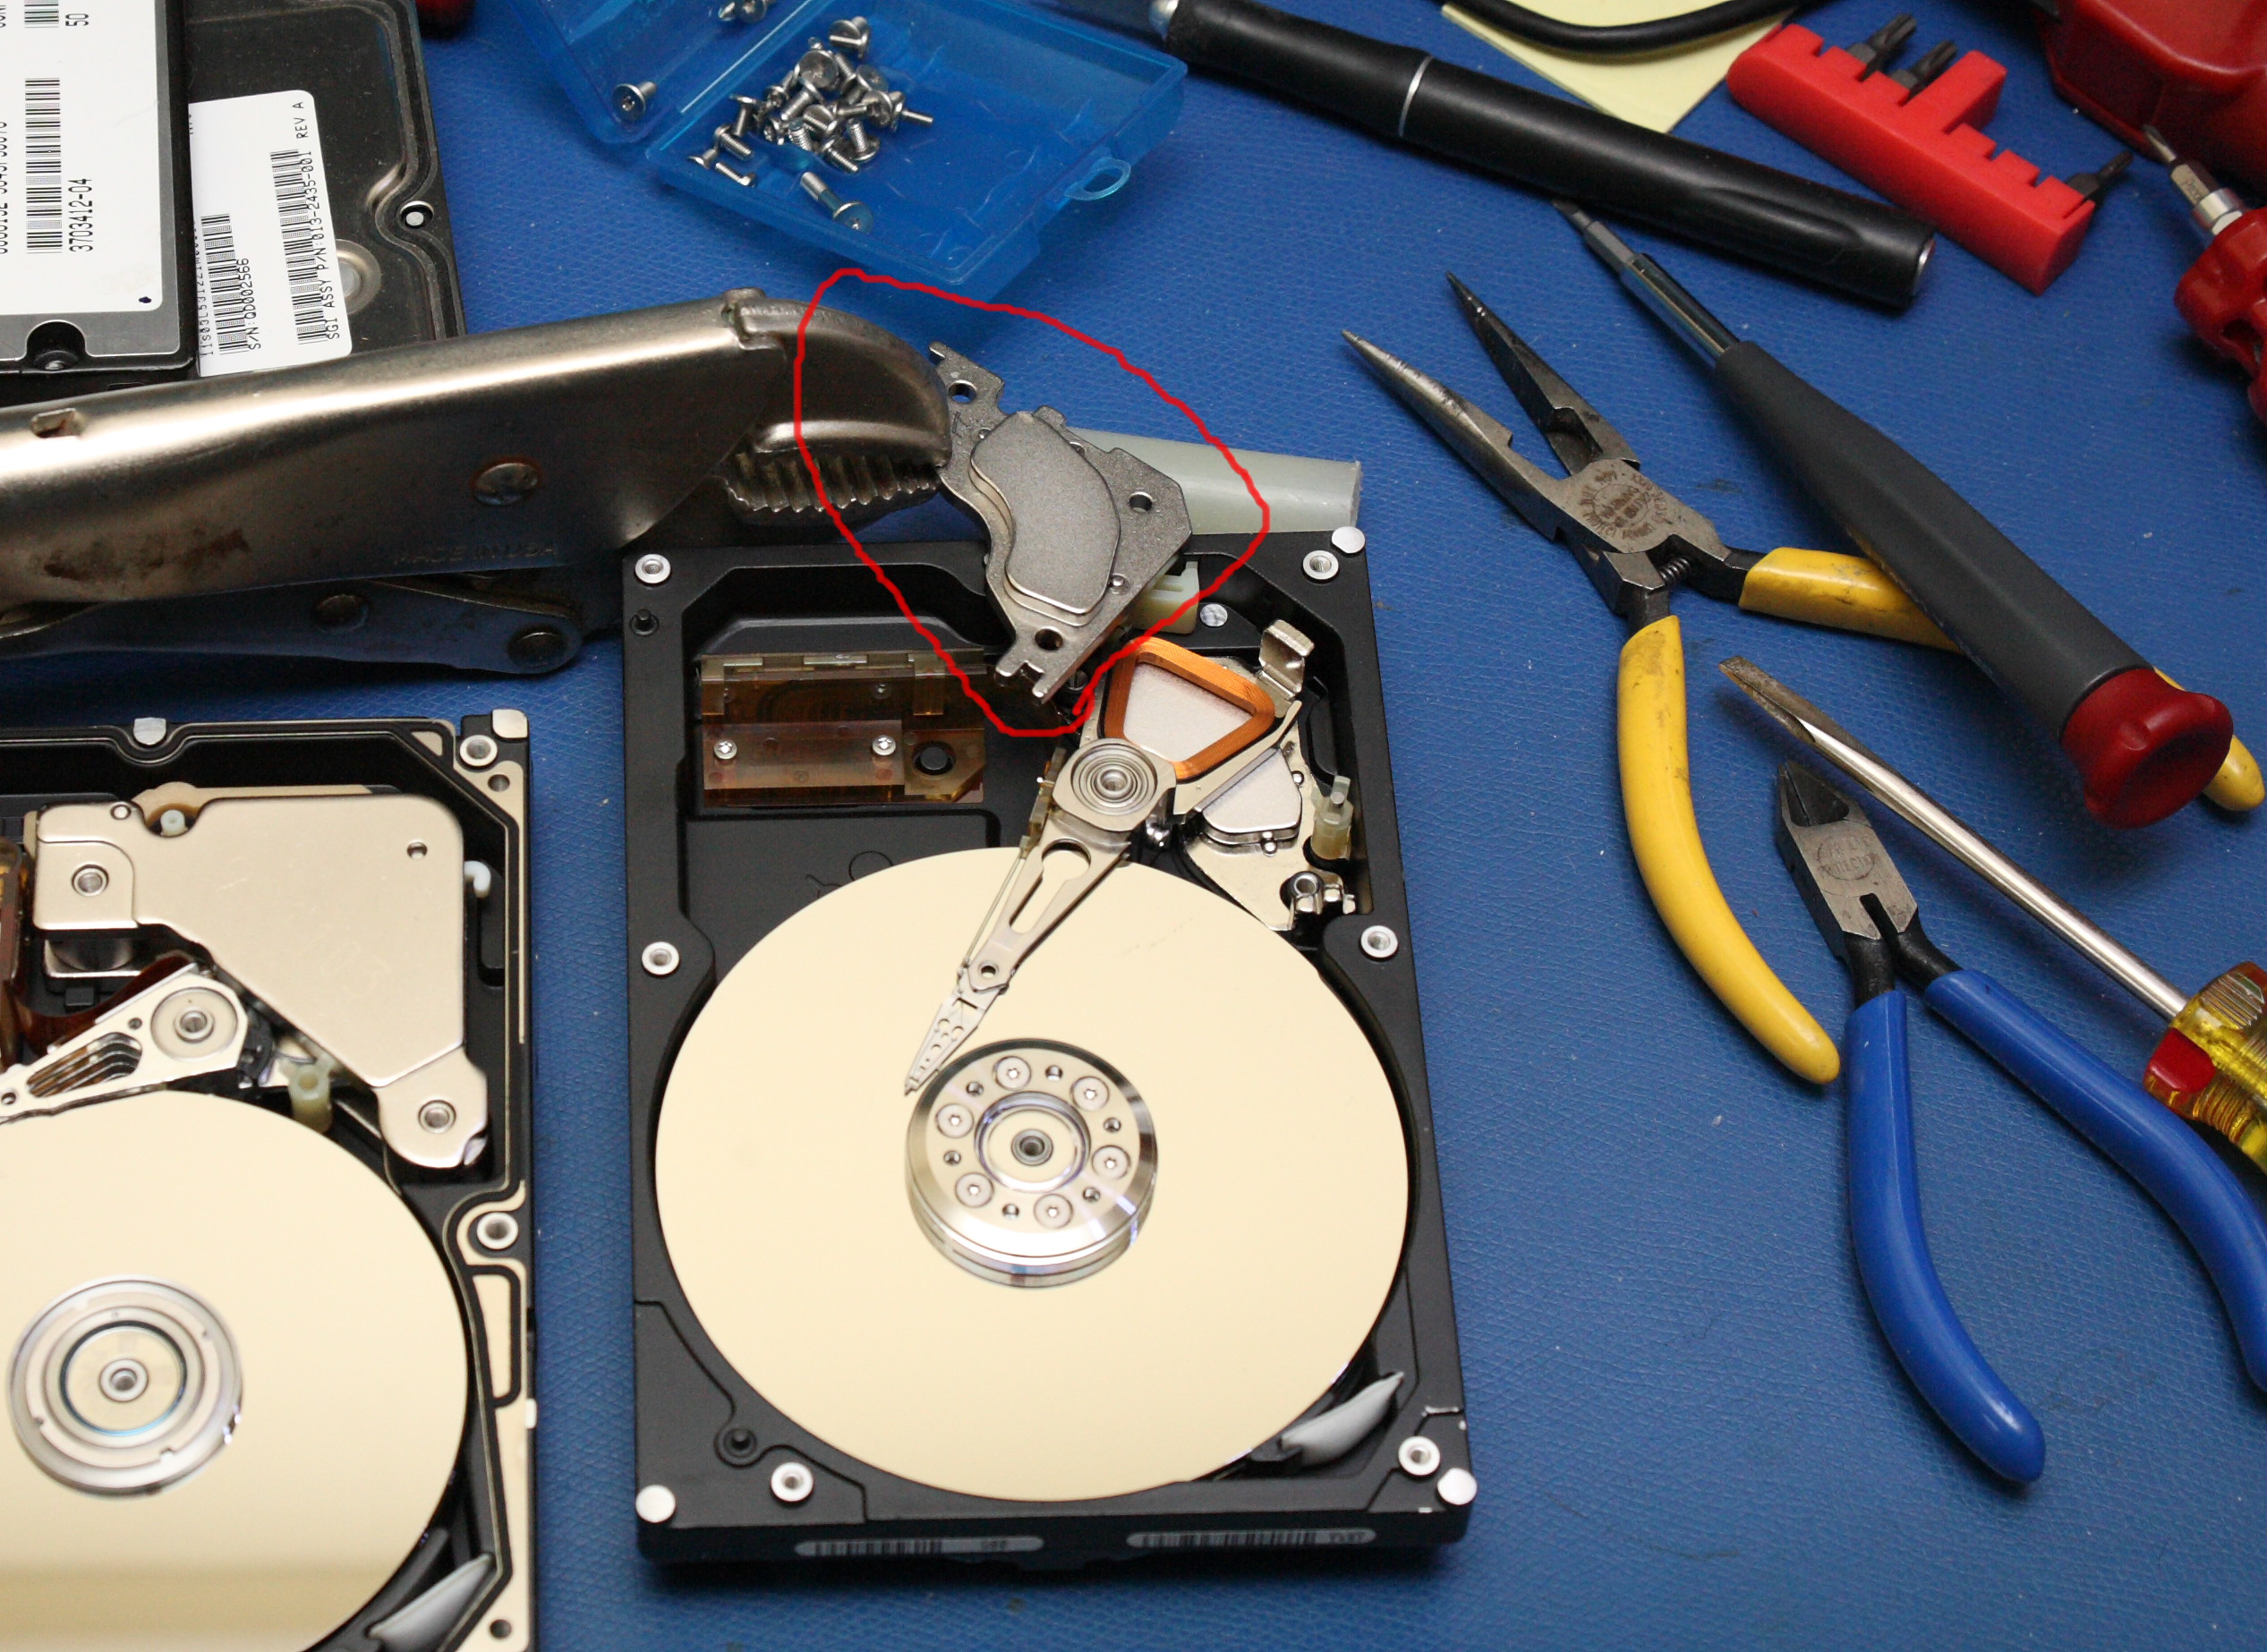 I did that with all three drives and had 3 nice magnets to show for it. Except there are more! If you look below: 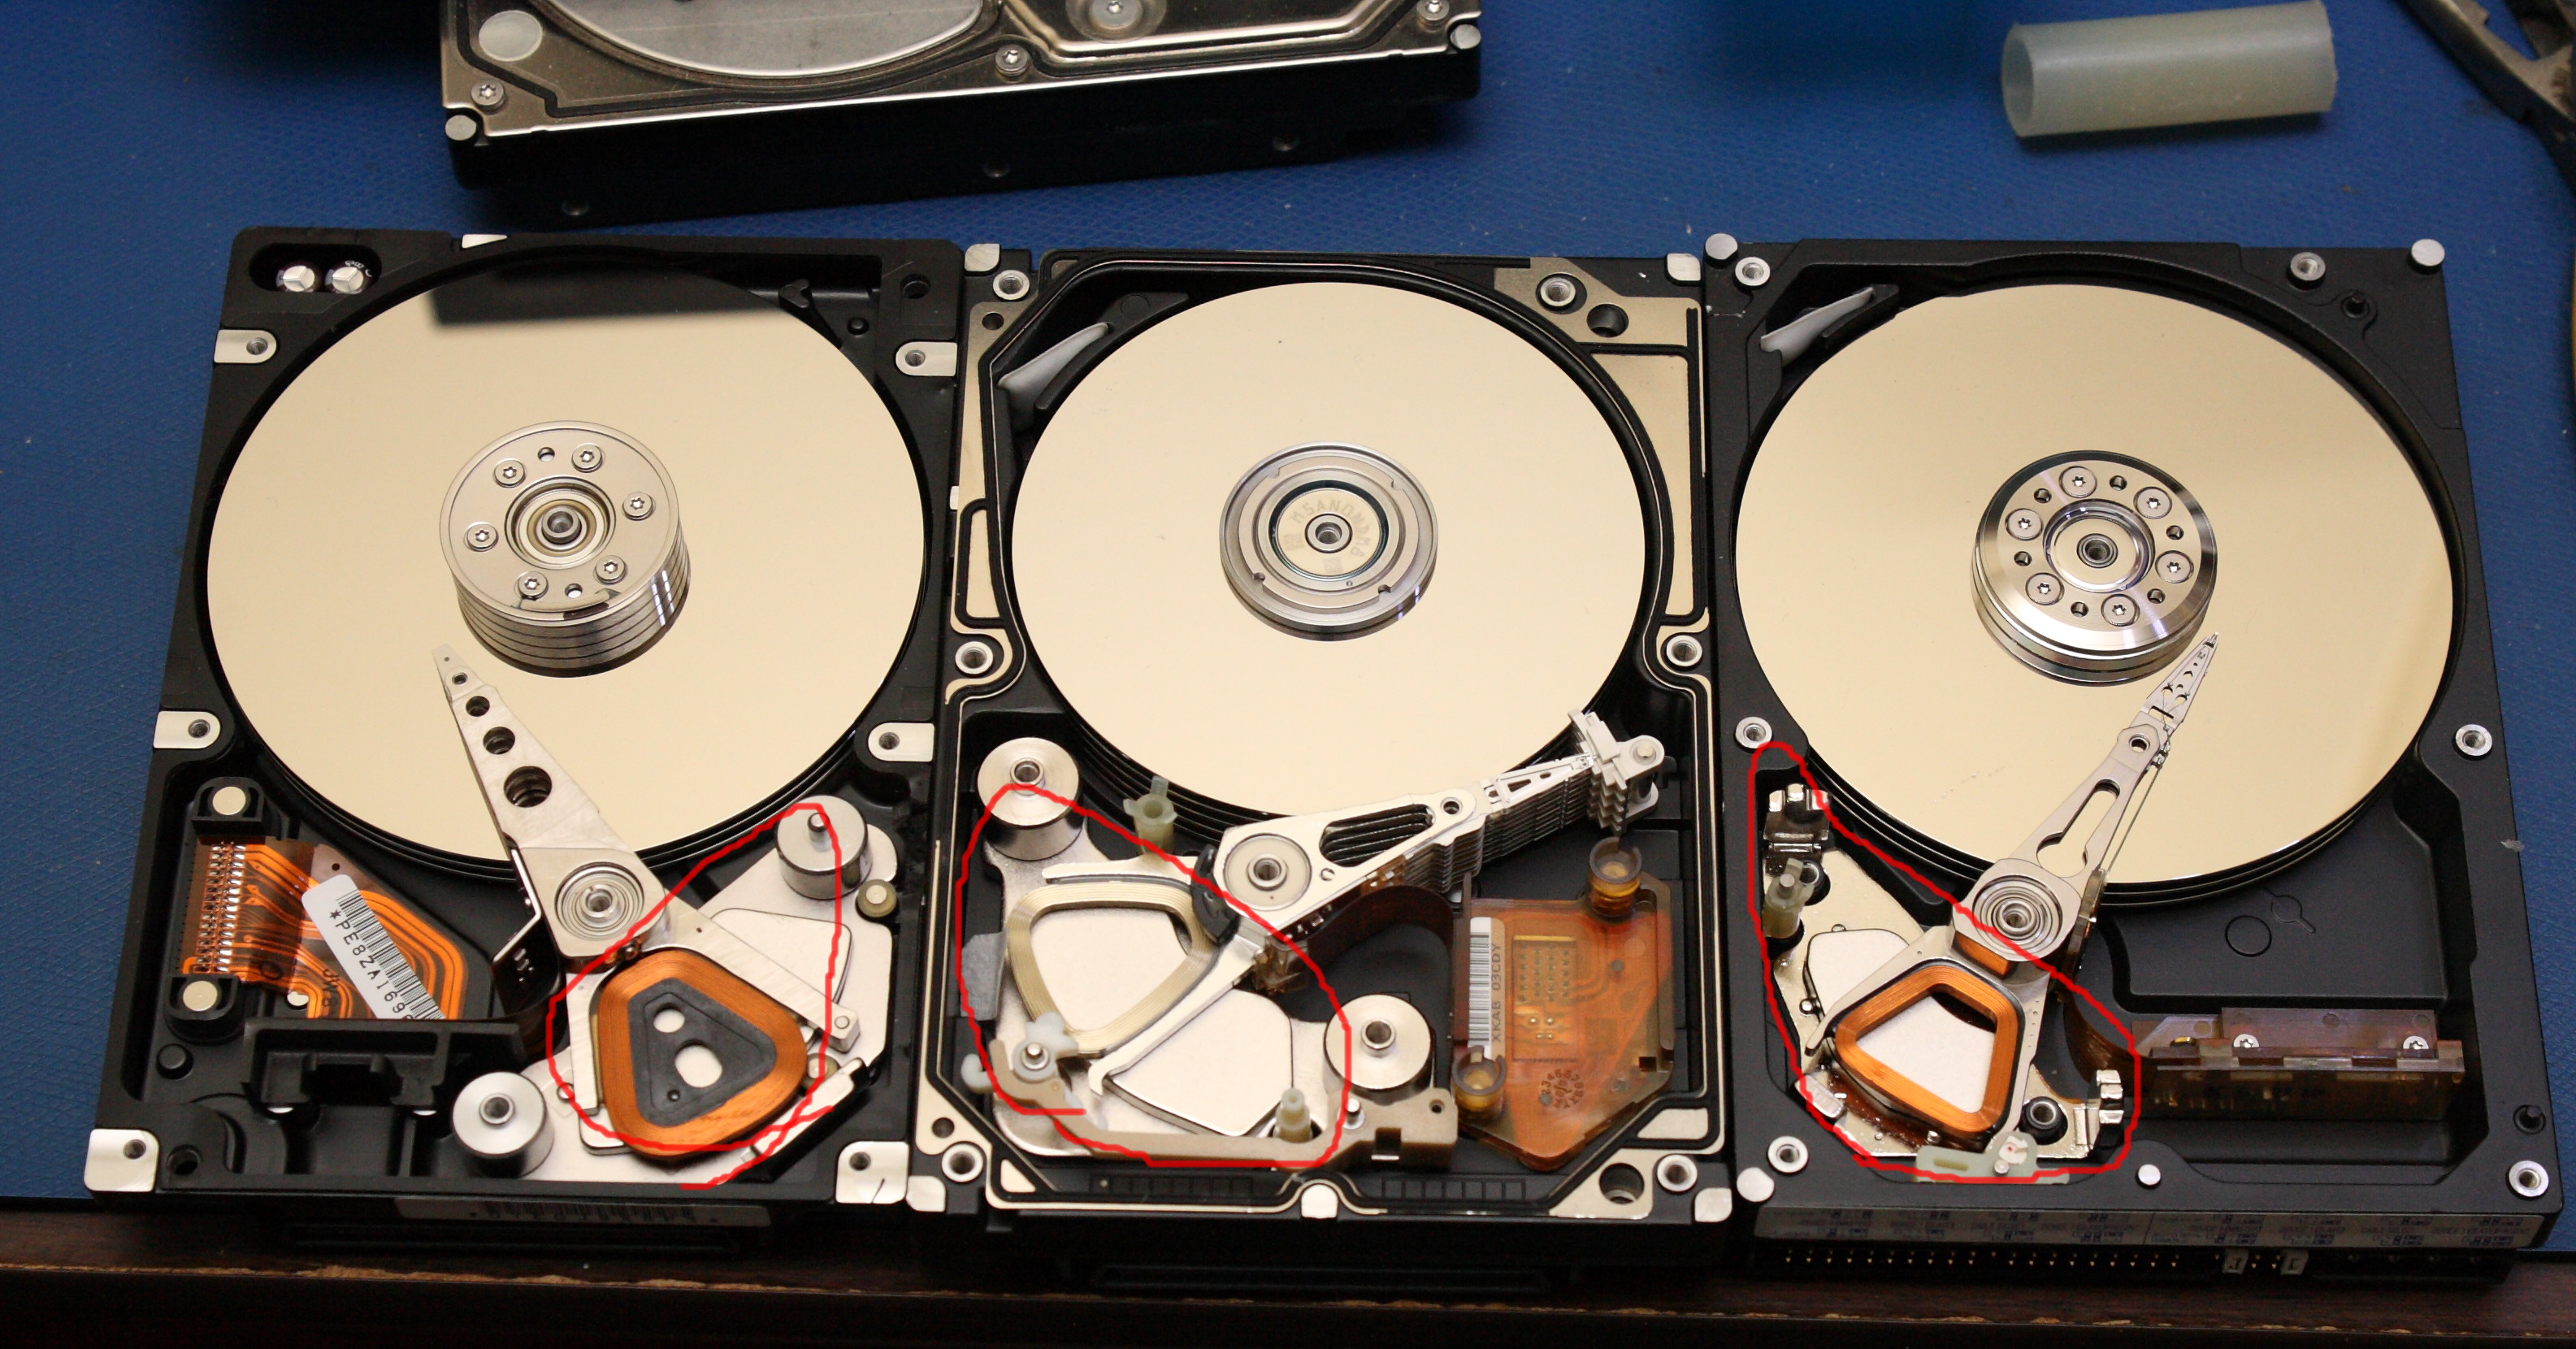 The head pivot arm swings back and forth to move the heads across the platter, and in these drives there is also a magnet below we can salvage. Getting to these requires flipping the drives over and pulling out more screws: 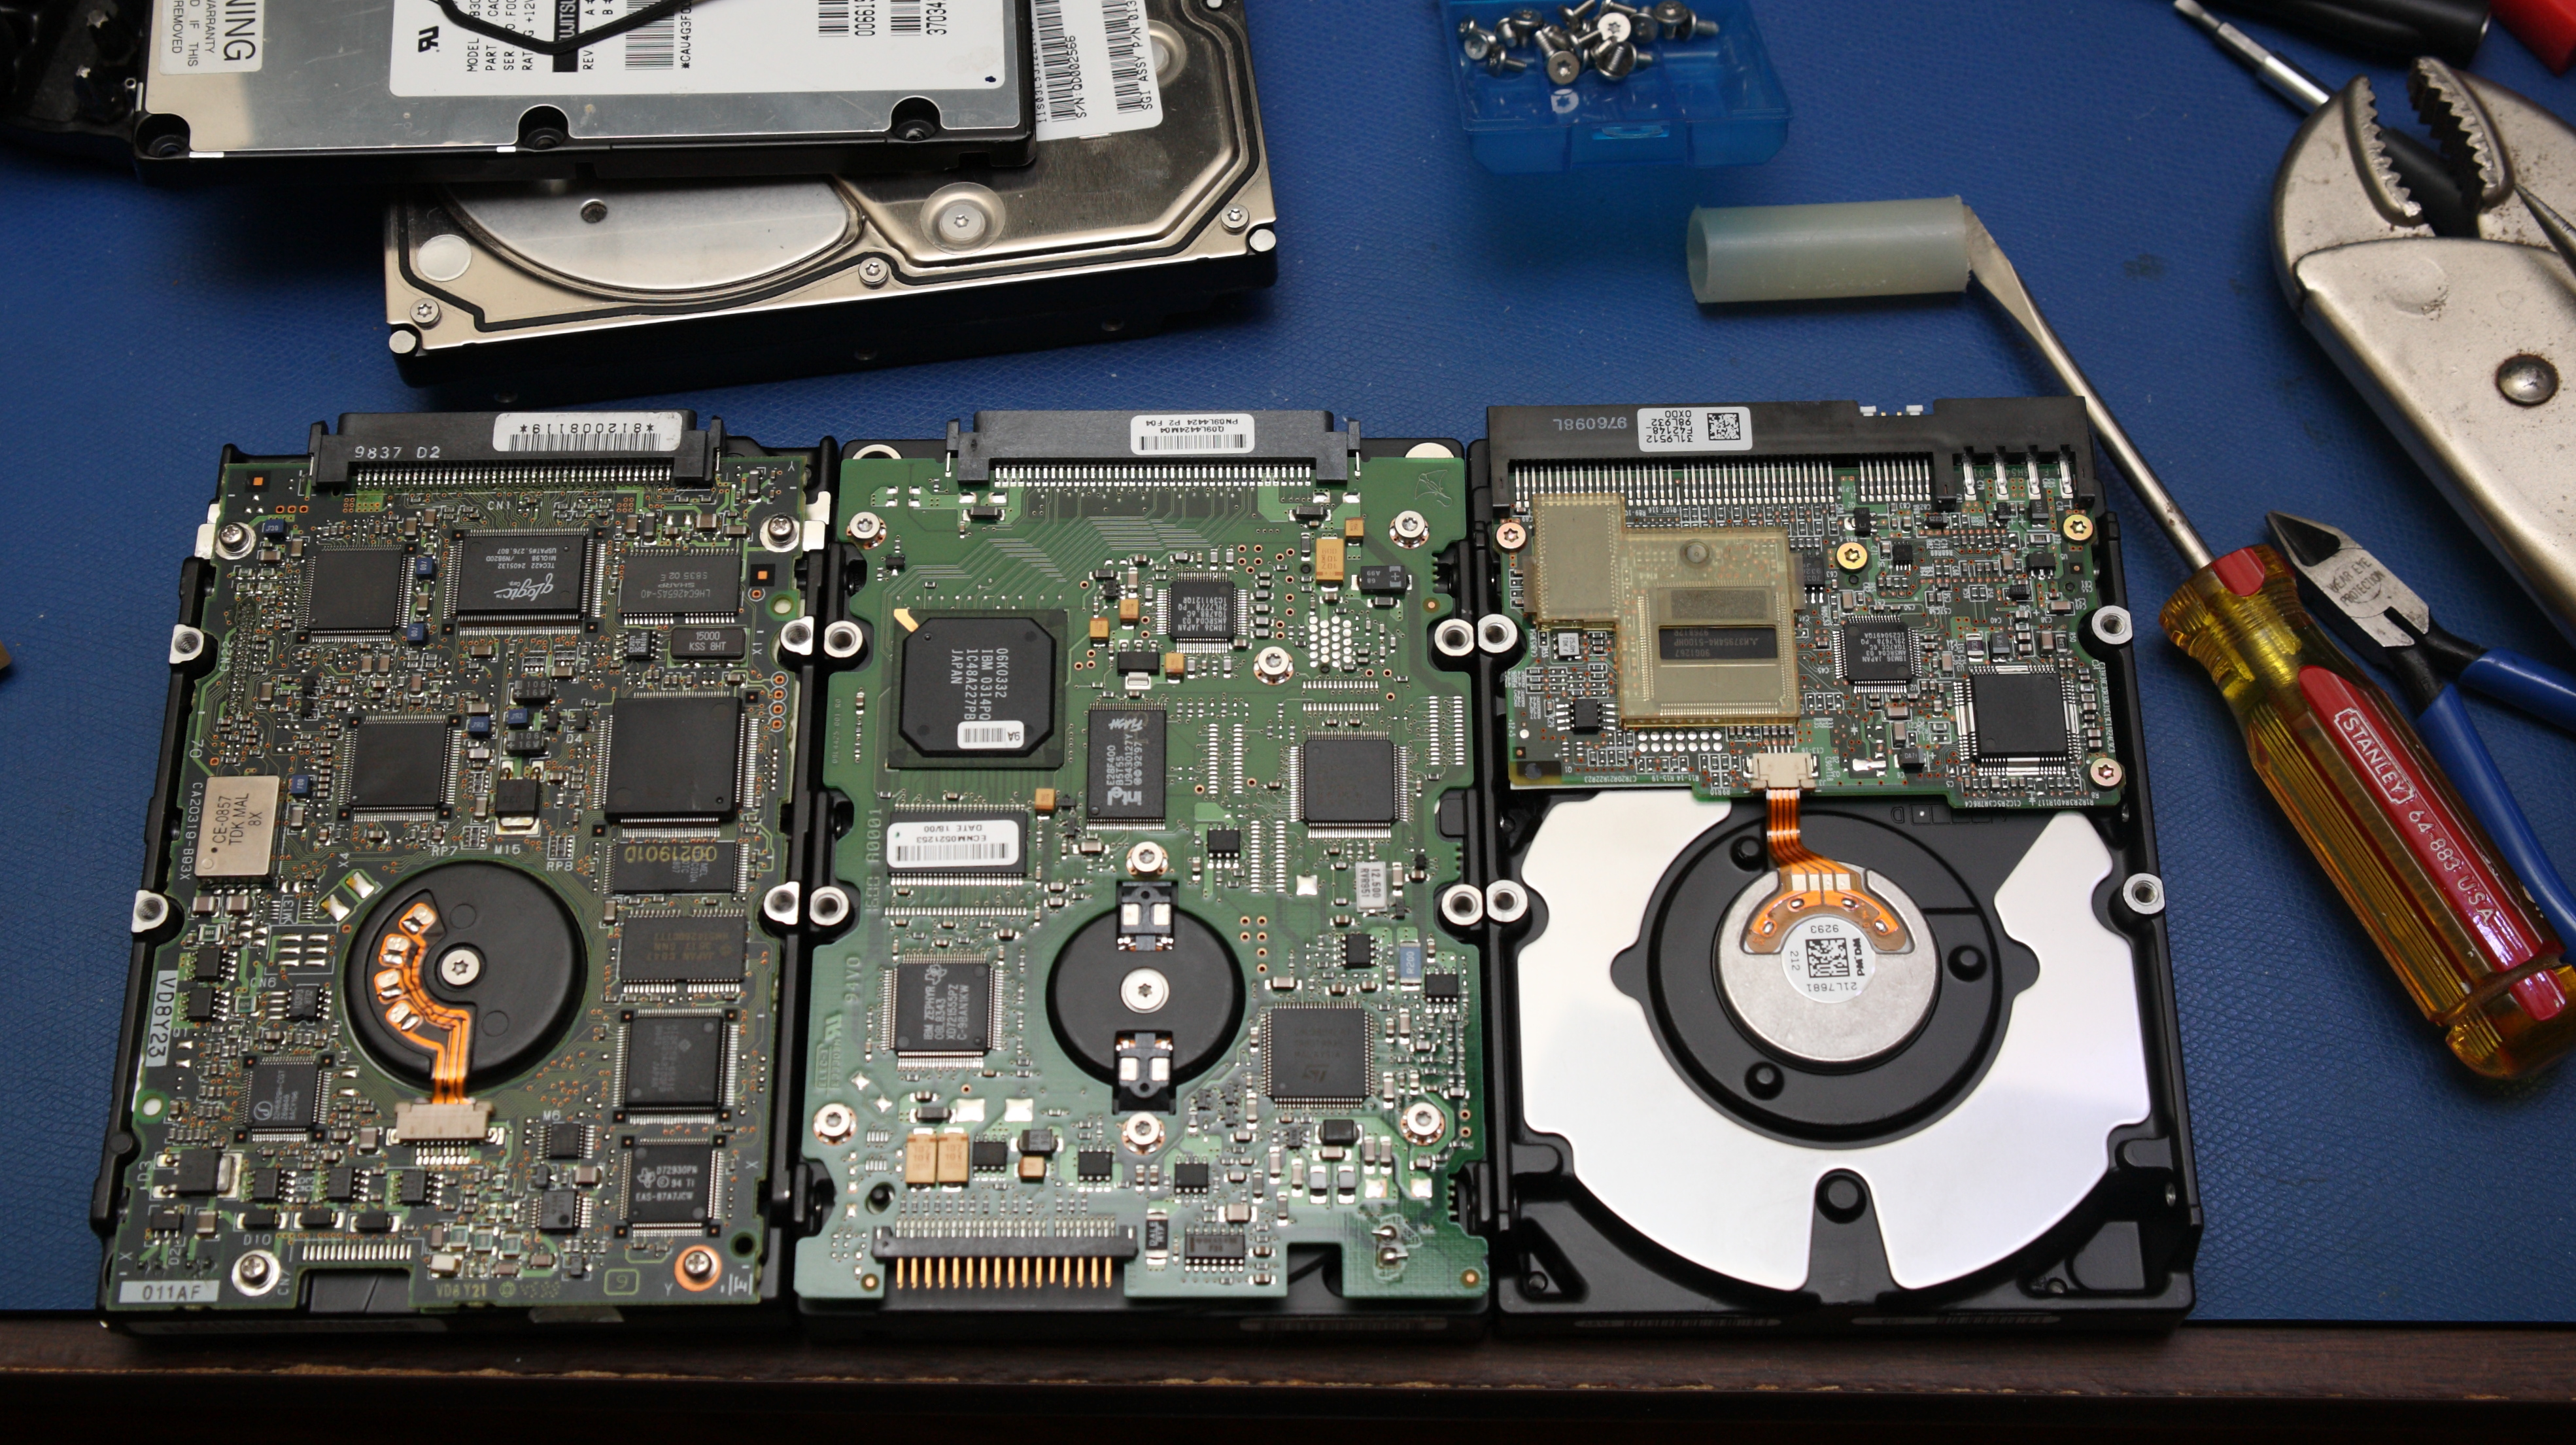 There they are on their backside, and following the same rules as above I started pulling off screws, peeling back labels, and voiding any warranties:  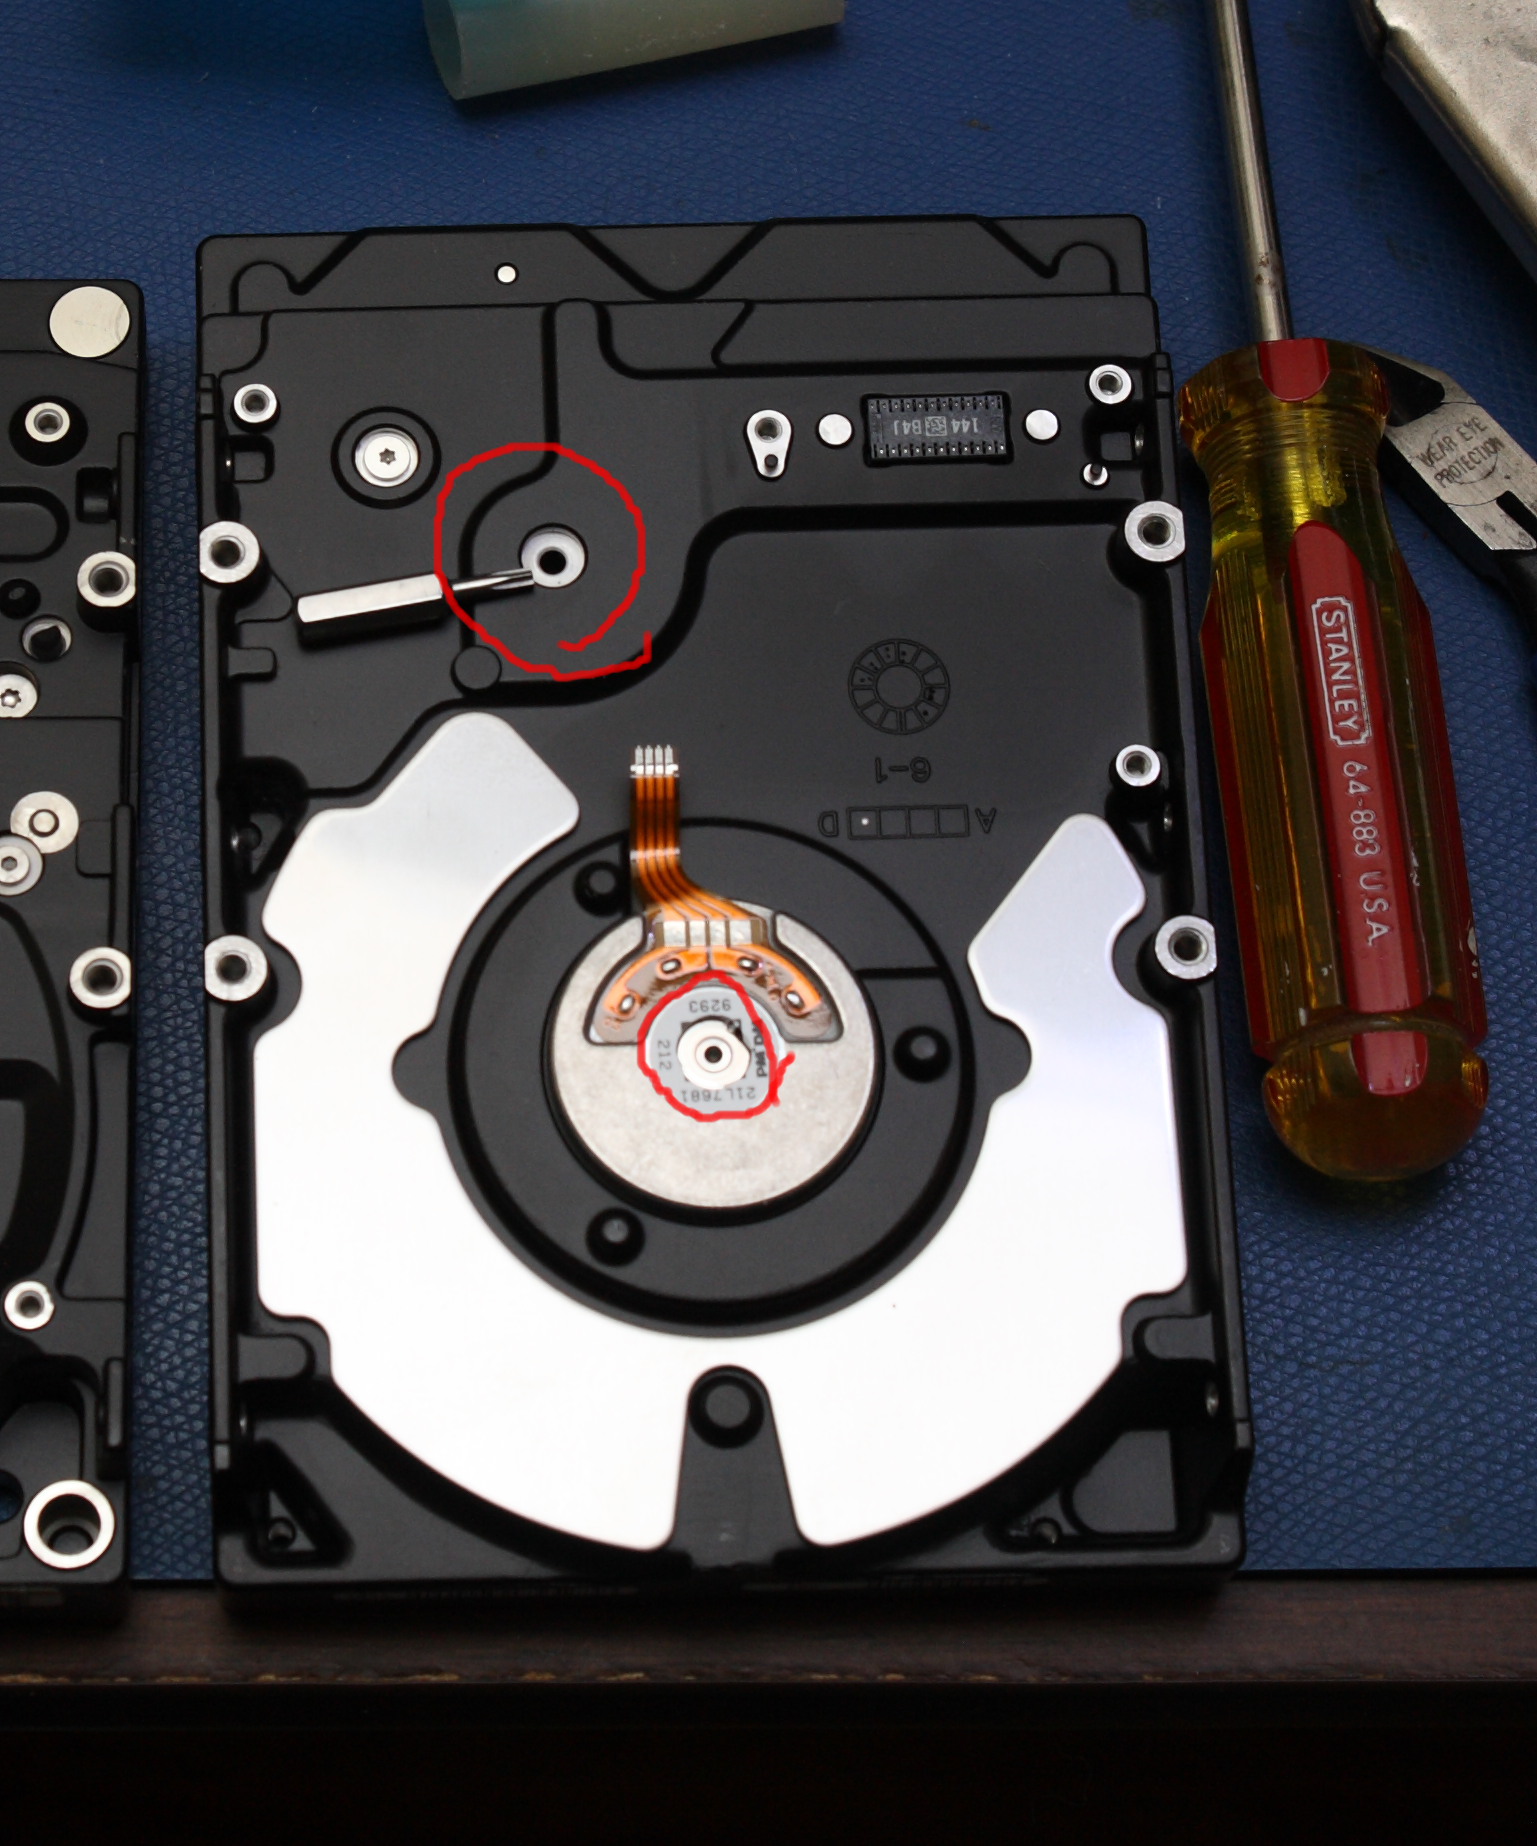 This is a close-up shot showing a hidden screw under a warranty label and another screw I removed.  The one screw held the head in, which I could now move out of the way. The lower magnet is less useful in this drive as if you look carefully there are 3 metal pieces sticking up on the bracket. I removed it anyway, though this is less useful than magnets that are just one nice clean piece. 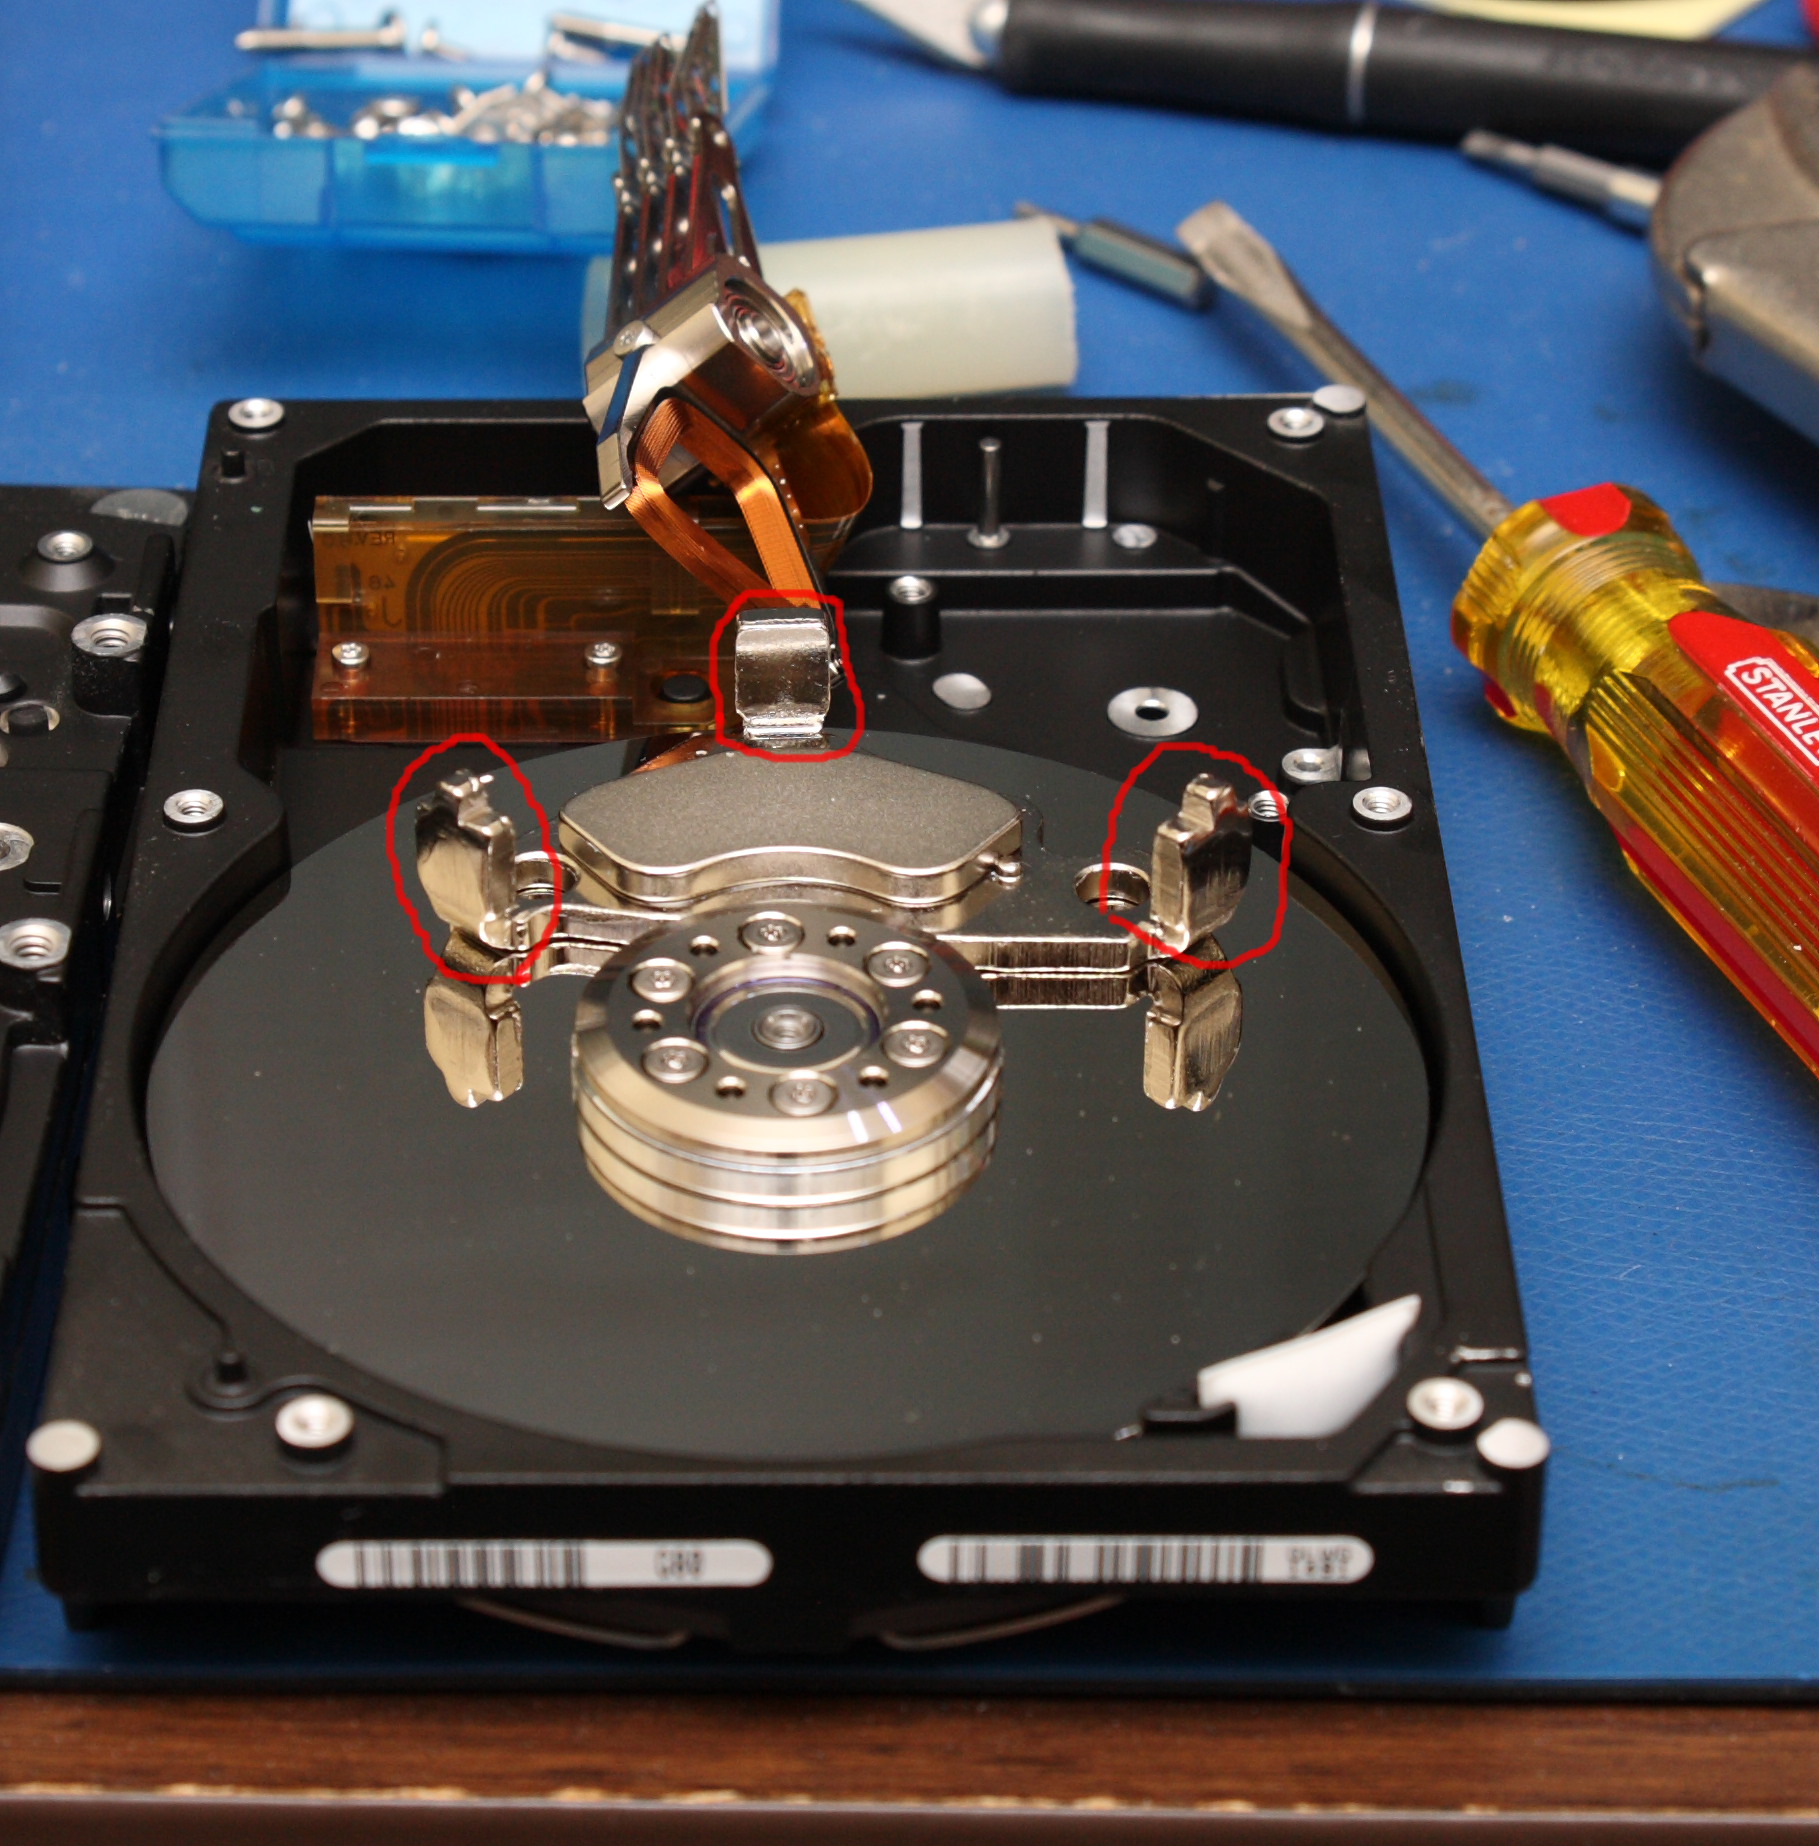 This shows the 3 parts of the bracket I was talking bout better than the last shot. 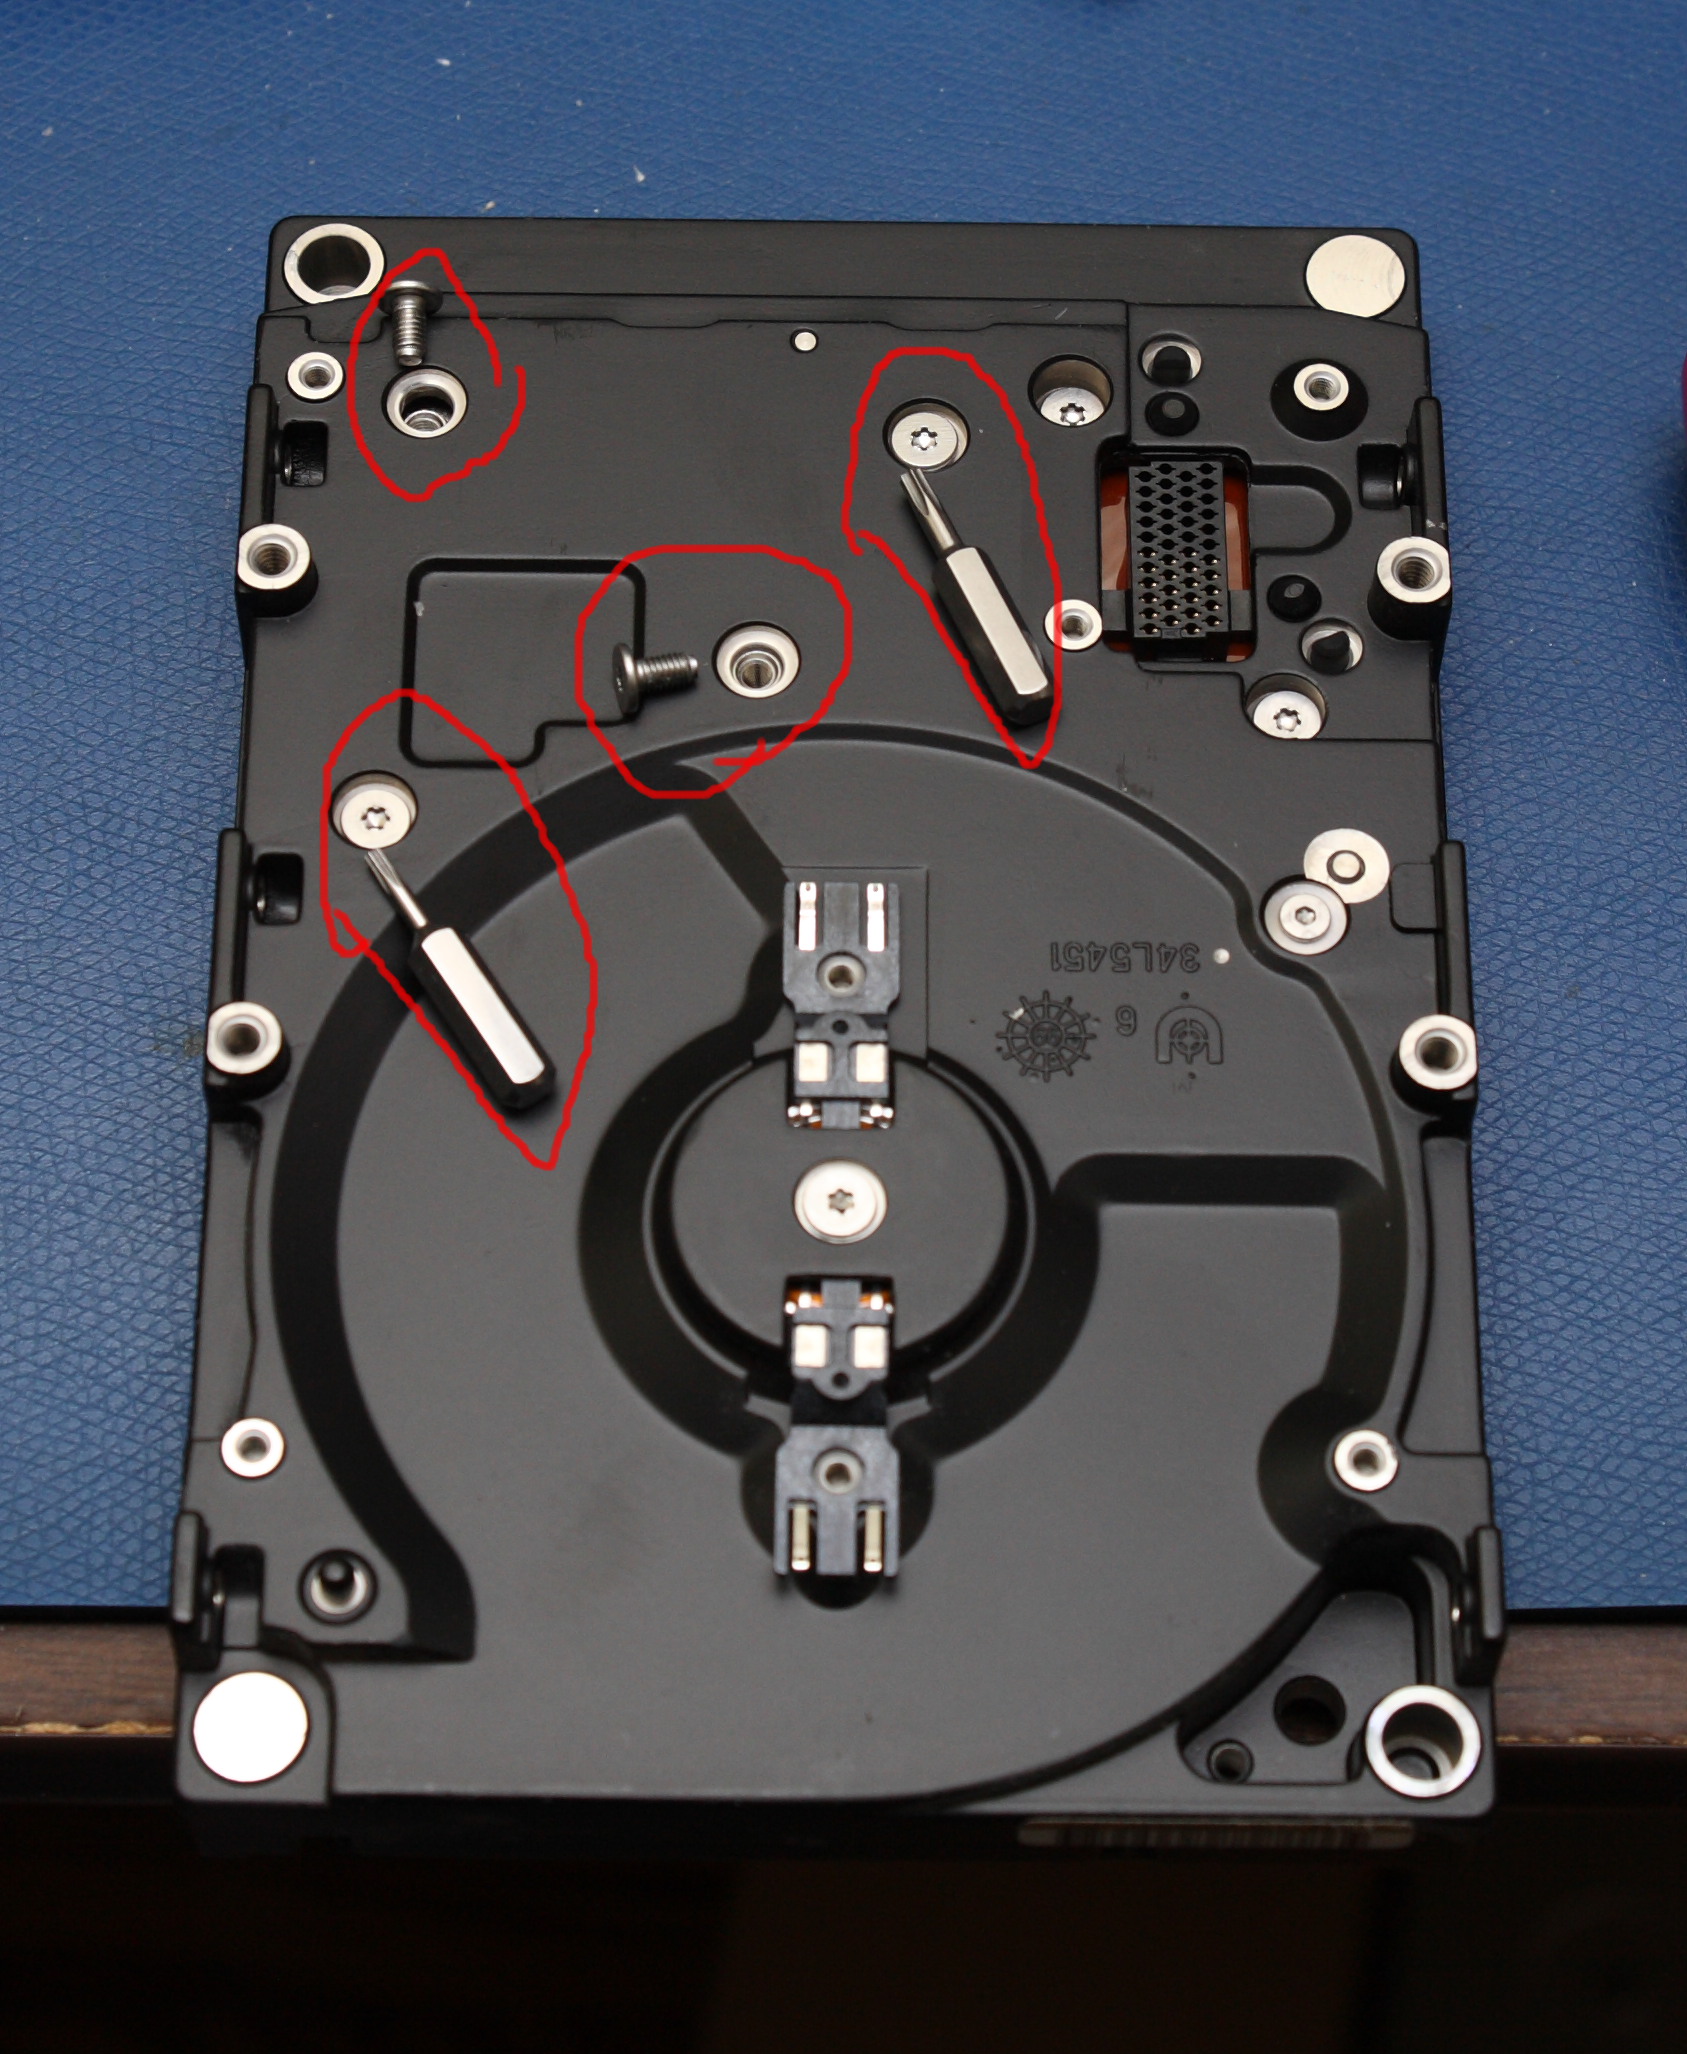 The middle drive had a bunch of screws to remove with my handy little Torx bits, and once they were removed...  Those round spacers came off and jumped onto the magnet. I had to use pliers to pull them away, and then ...  Lift the head out of the way and the magnet came right out, nice and clean, without those big metal posts! 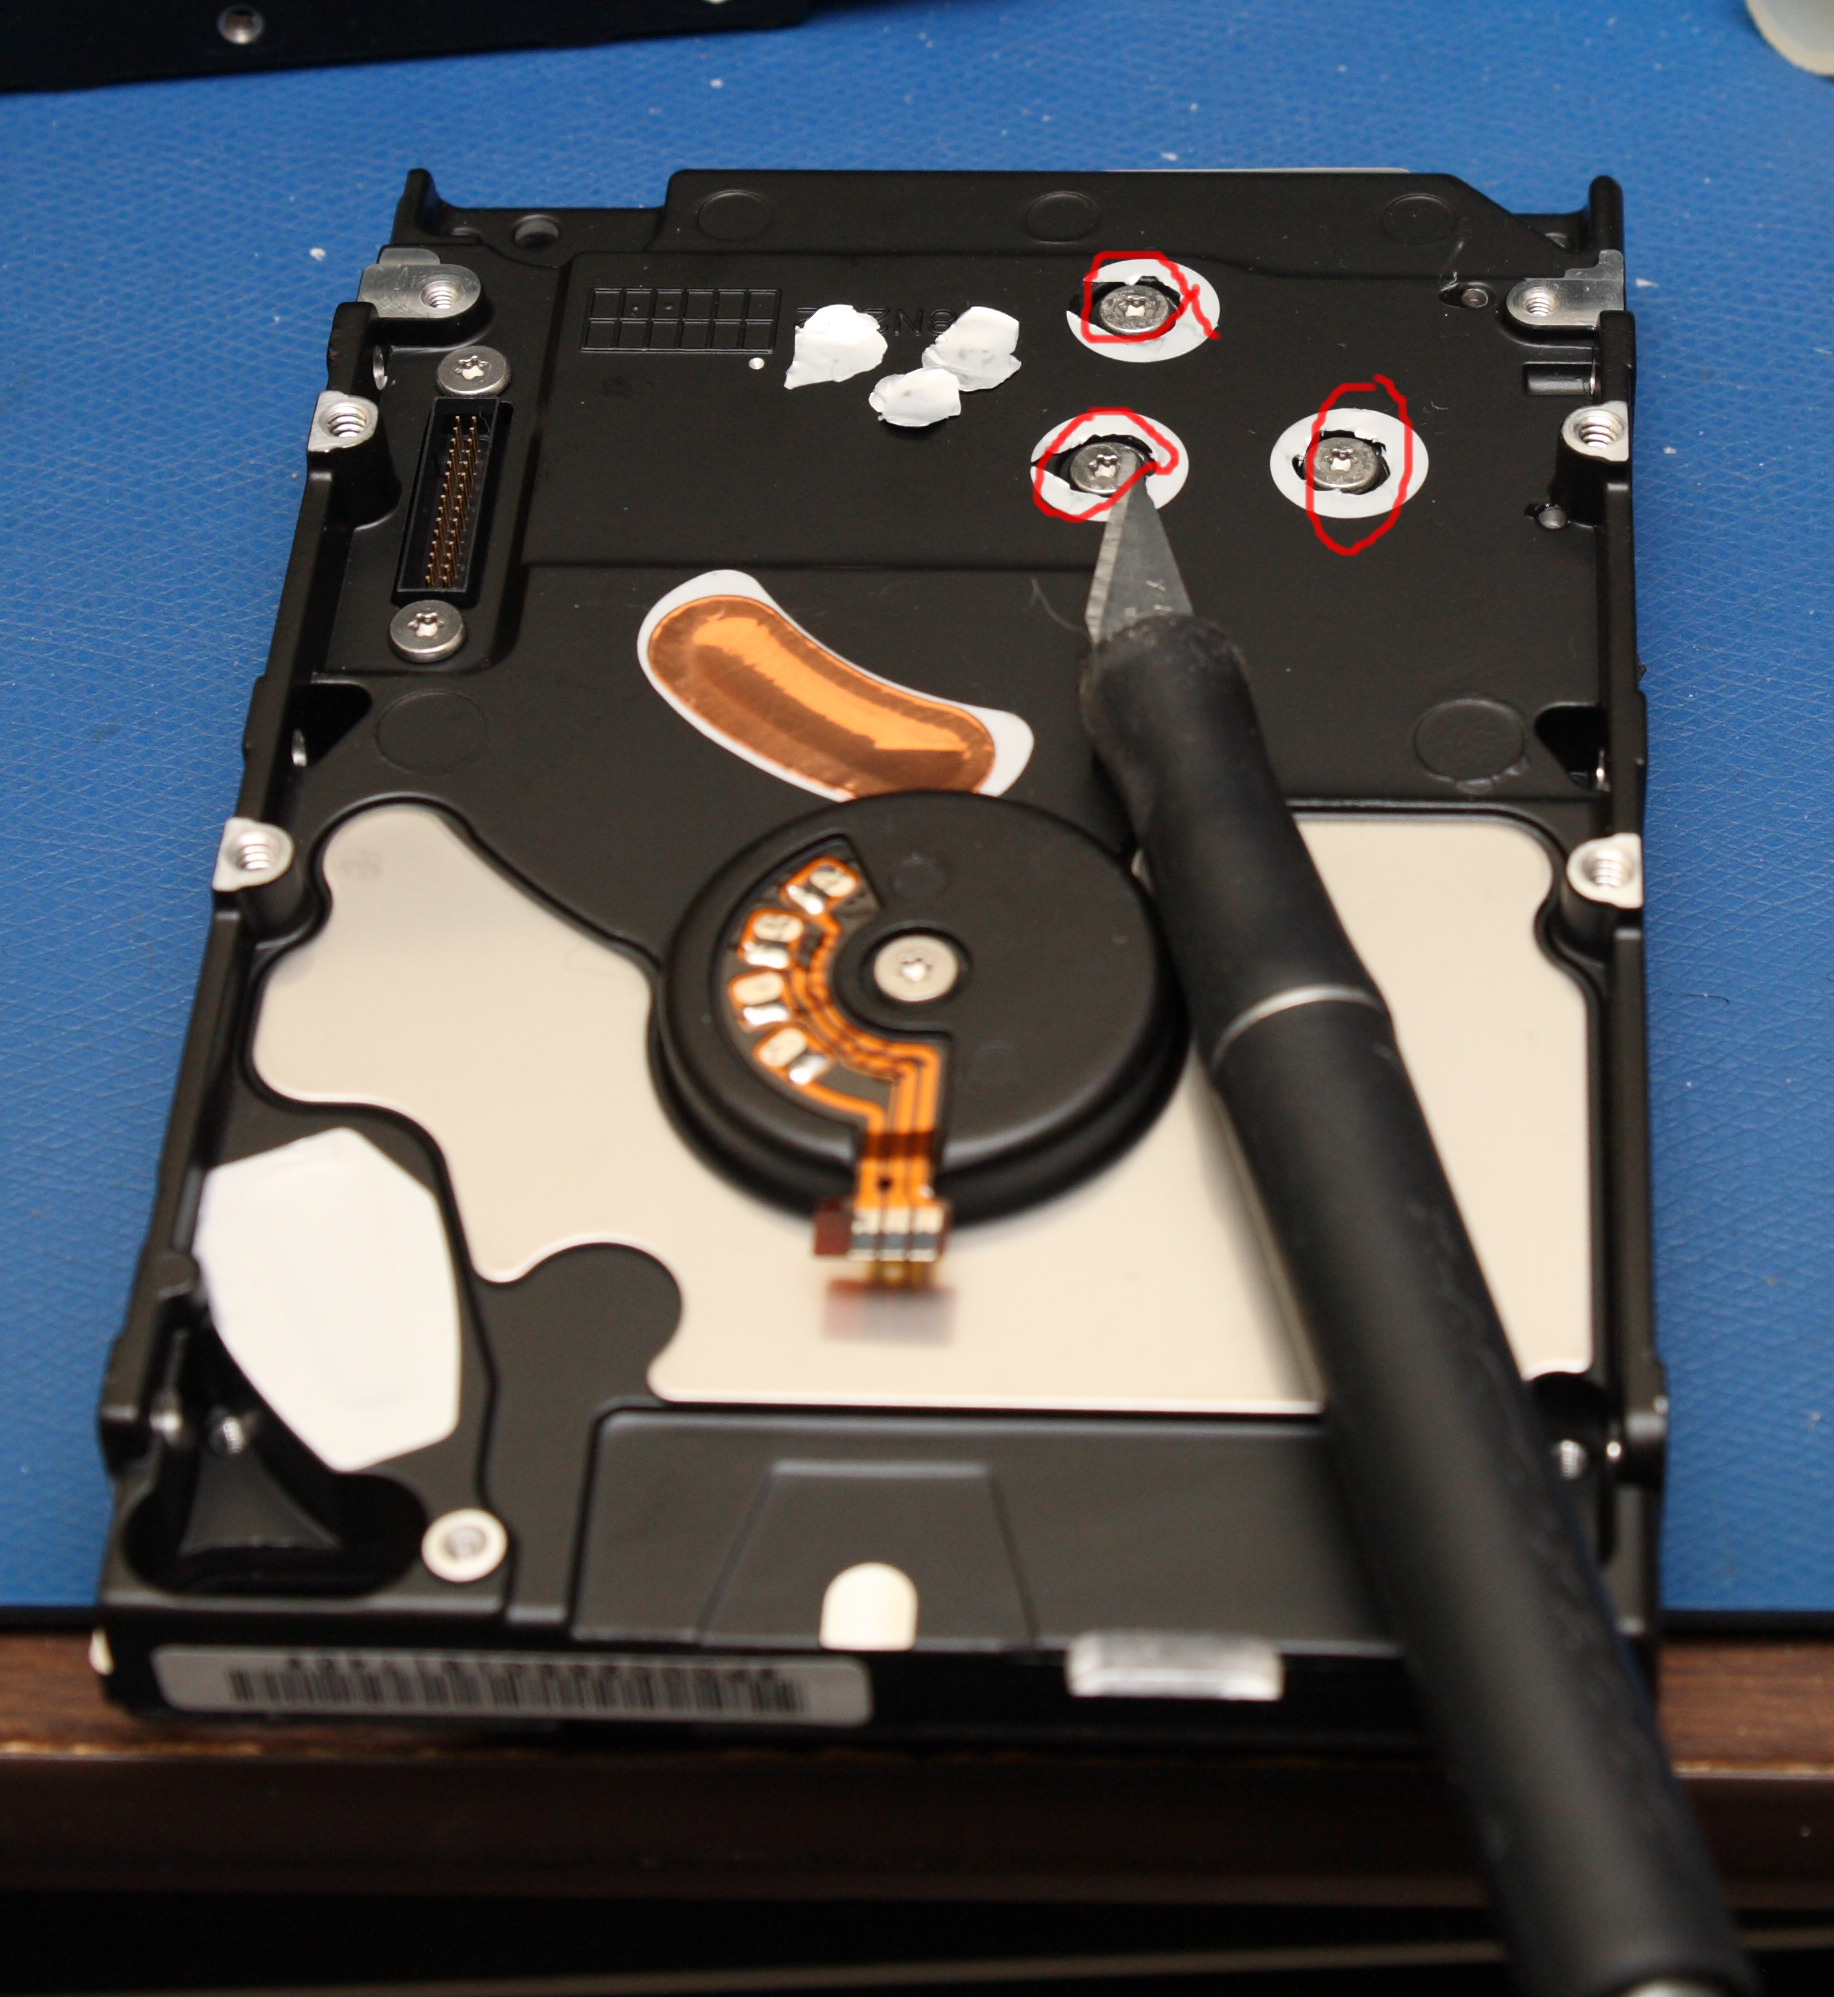 The last drive had white stickers over the Torx screws, circled and pointed to with the x-acto knife. Remove those, and... 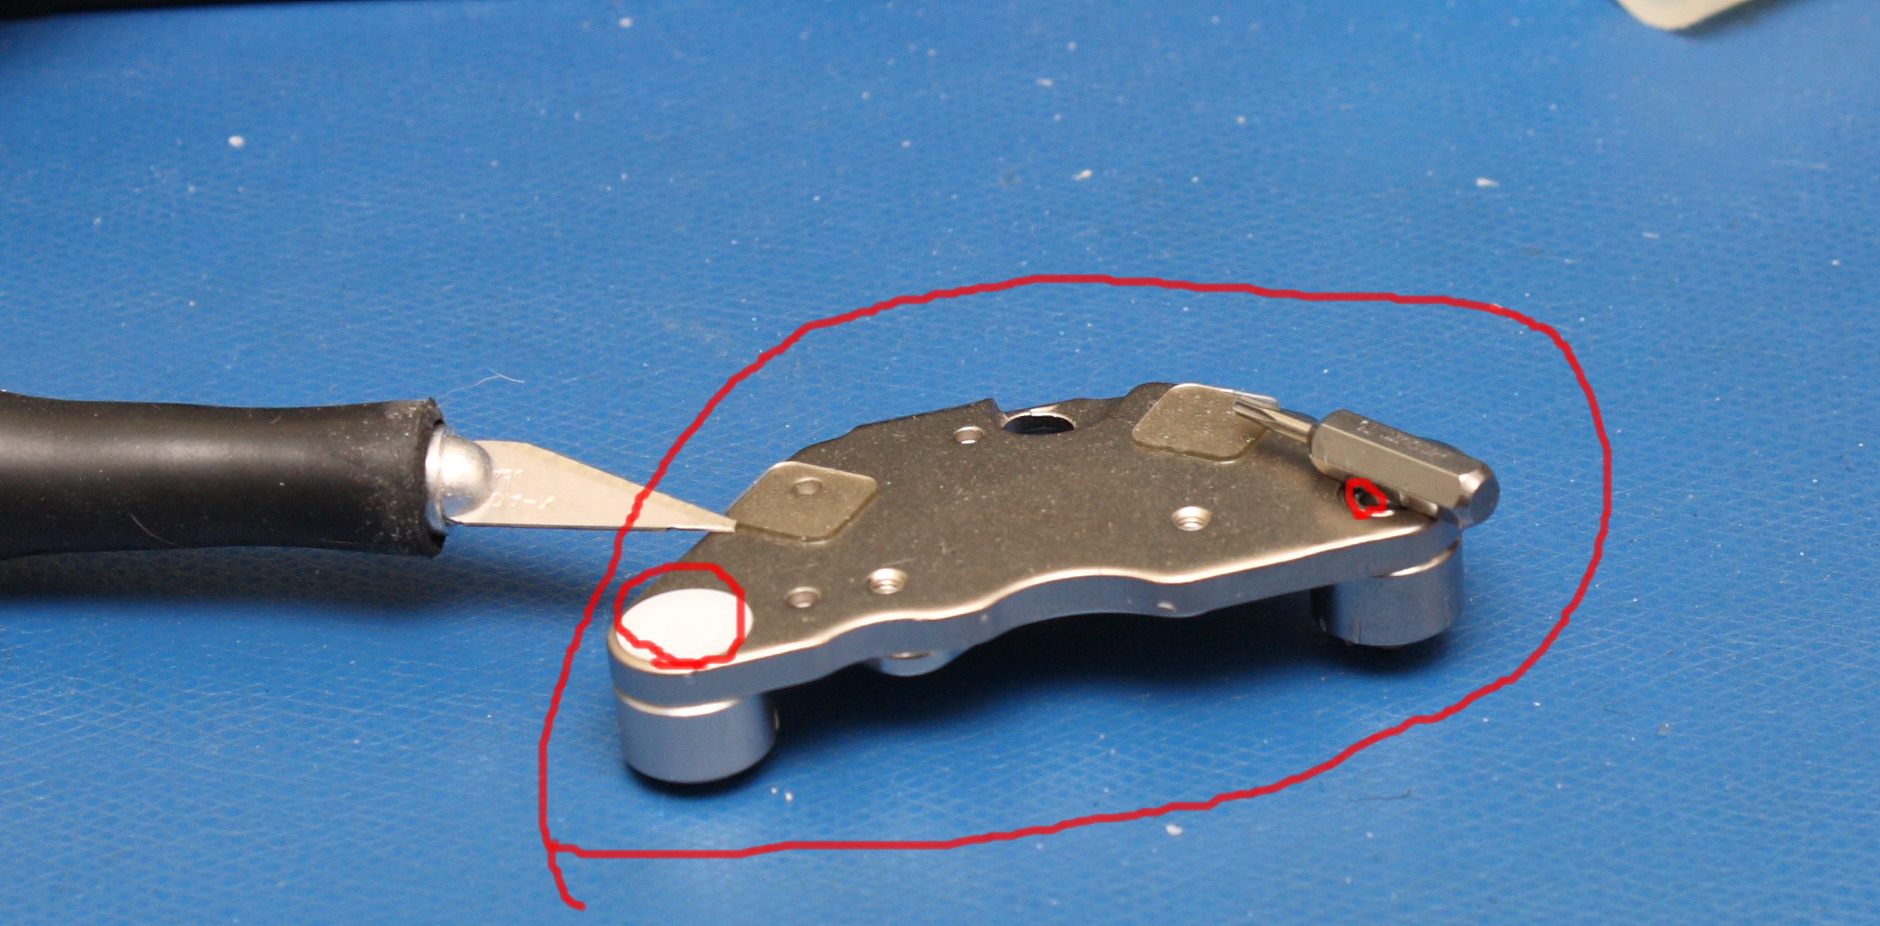 There is your magnet! It too had posts, but if you pull off the white sticker just below the x-acto knife and the bit they came out with another screw. The clear plastic squares pointed to by both the x-acto and the Torx bit were just sticky double sided blobs that peeled off, probably there to aid in assembly. Enjoy! David Soussan Copyright (C) 2014 DAS Computer Consultants, LTD.
|
||||